01 · Match the season
Put the right season on the map.
I updated the seasonal filter so October shows fall observations. Every note keeps its date. Park guidance stays separate from my sightings.
I built the planner from scratch for Yellowstone and Grand Teton, along with the full WordPress website around it. I used what I’ve learned in the parks, conversations with photographers and visitors, and feedback from people trying the site to work through what it needed to do. I took it from Figma flows and components to a working product with Mapbox, paid access, and routes people can save as a PDF.
Where the Wild Beasts Roam · Wildlife planner
See how I turned conversations in the parks into a working planner, then rebuilt the website around it.
Chapter 1 of 9
See how my time in the parks became a product someone could use to plan a drive.
Explore at your own pace.The planner needs to help someone decide where to start and how the drive will fit together.
From the parks to the planner
I spend a lot of time hiking and photographing wildlife in Yellowstone and Grand Teton. I wanted to use what I’d learned to help people plan a drive of their own.
A wildlife observation gives someone a place to look. They still need to work out where to start, how the stops fit together, and what they have time to do. I built the planner to help them work through those choices.
People can start with a suggested route or build their own around the wildlife and attractions they want to see. Then they can review the drive and save it as a PDF before heading out.
Chapter 2 of 9
See who I spoke with outdoors and how people helped me test the website.
Explore at your own pace.I needed to understand how people planned a trip and how they used the website.
02 Research and design decisions
I spoke with people while I was outside walking around and photographing wildlife. I also spoke with visitors online and arranged interviews. As I worked on the website, I had people come and test it so I could see how they used what I’d built.
Conversations, interviews + website testing
I spoke with people in the parks about how they planned a wildlife drive. Later, I watched people use the website to work out how to explain the planner and help them try it.
Conversations outdoors, online conversations, and arranged interviews.
Input into the plannerWatching people use the website helped me see what needed work.
Input into the websiteI spoke with wildlife photographers while I was out in the parks about what they wanted from a trip. I still use those conversations to decide what to work on next.
I also spoke with visitors on Facebook and arranged interviews. I wanted to understand what they hoped to see and what they needed to know before using the planner.
I had five people browse the website through a UX testing company. Watching those sessions helped me see which parts of the website needed work.
Chapter 3 of 9
Try the component examples, then see how I connected the design to Mapbox and the saved plan.
Explore at your own pace.The questions, map, and saved plan need to agree, even when someone changes an answer.
03 How I designed and built it
I used Figma to design both ways to plan. I worked through the questions, the components, and what should happen when someone went back to change an answer. Then I created the HTML components and built those flows into a custom WordPress plugin.
Design into development
I used Mapbox for the map and road routing, then built the planner around it with HTML, CSS, JavaScript, and back-end code. My WordPress plugin keeps the trip choices, dated observations, route rules, directions, and saved PDF connected.
I used ChatGPT and Codex to help me work through programming issues and revisions. I made the design decisions, checked the behavior, and kept changing it when a route or a saved plan didn’t work as it should.
I used the same choice cards, buttons, and progress controls in both ways to plan. Try the examples to see how they show what someone has selected and completed.
A border, tint, and checkmark show the selected card. The checkmark keeps the state clear without relying on color alone.
WTWBR / Planner choice
State: Default · Selected
Interaction: Default · Hover · Pressed · Focus
A card can stay selected while someone hovers over it or uses a keyboard to reach it.
I kept labels, sizing, and icon spacing consistent across normal, focused, and unavailable states.
WTWBR / Button
Label: editable text
Tone + State: separate variant properties
The highlighted area in the planner uses the Text tone for “Choose another planning method.”
The planner shows where someone is and which questions they’ve answered. Going back to a step doesn’t mark an unanswered question complete.
WTWBR / Guided progress
Step + Complete: separate variant properties
Opening a step does not count as answering it. The planner checks whether the required answer is there.
This component example uses the earlier “Offline Access” label. The current planner saves the route as a PDF.
The park cards use the shared Planner choice design.
A browser version of my Figma planner study, using the planner’s own controls, icons, and colors.
Shared styles cover brand colors, surfaces, text, and selected choices.
brand/forest · #223F17
brand/coral · #FF825C
surface/canvas · #F6F7F2
surface/selected · #EAF2E4
I saved text sizes, spacing, and corner styles in the same library.
I designed empty, answered, focused, error, and unavailable states. Labels and help text stay editable so the field can be reused.
I keep the visitor’s choices in one route plan so the map, directions, and PDF describe the same drive. I also built the connections between checkout, member access, and the planner so customers could sign in and use it again.
I fixed the public sample PDF by making the export wait for the map tiles and markers to load. I then fit the whole map into the print frame so the start and turnaround stayed visible, and checked the published PDF against the route on screen.
Chapter 4 of 9
Compare the earlier map with the trip-first planner, then try the sample.
Explore at your own pace.The route starts with where someone will begin, what they hope to see, and how much time they have.
04 Planner redesign
The first version opened on a map with wildlife filters. People could explore the observations, but they still had to put the drive together themselves. I changed that. Now they start with where they’ll begin, what they hope to see, and how much time they have. The planner uses their answers to build a route they can review and save.


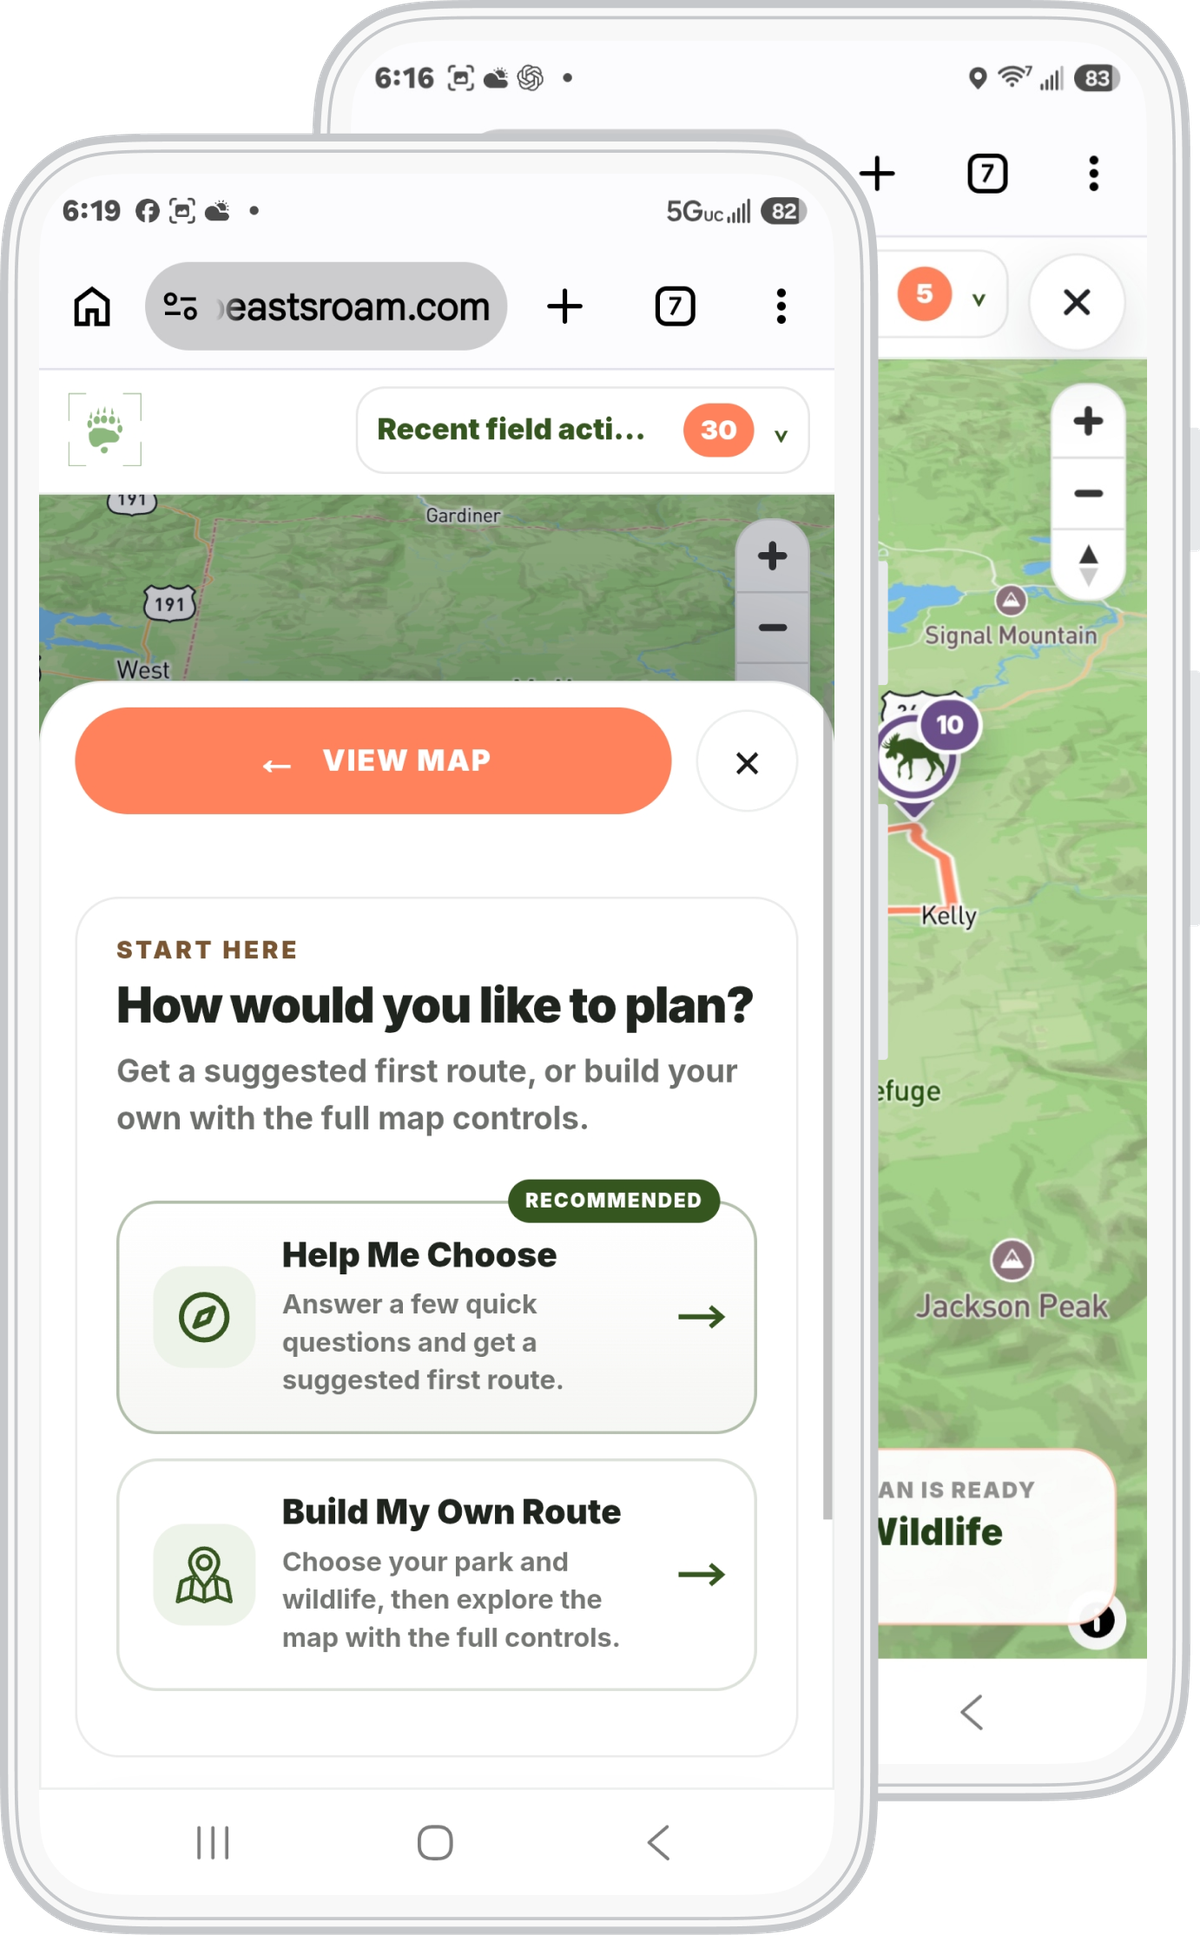
I changed the opening so people could decide how they wanted to plan. Help Me Choose starts with a few questions and suggests a route. Build My Own Route lets them pick the wildlife and viewing areas themselves.
From there, they can review the drive, make changes, and save the route as a PDF.
Previous planner

Redesigned planner

04 From trip details to a route
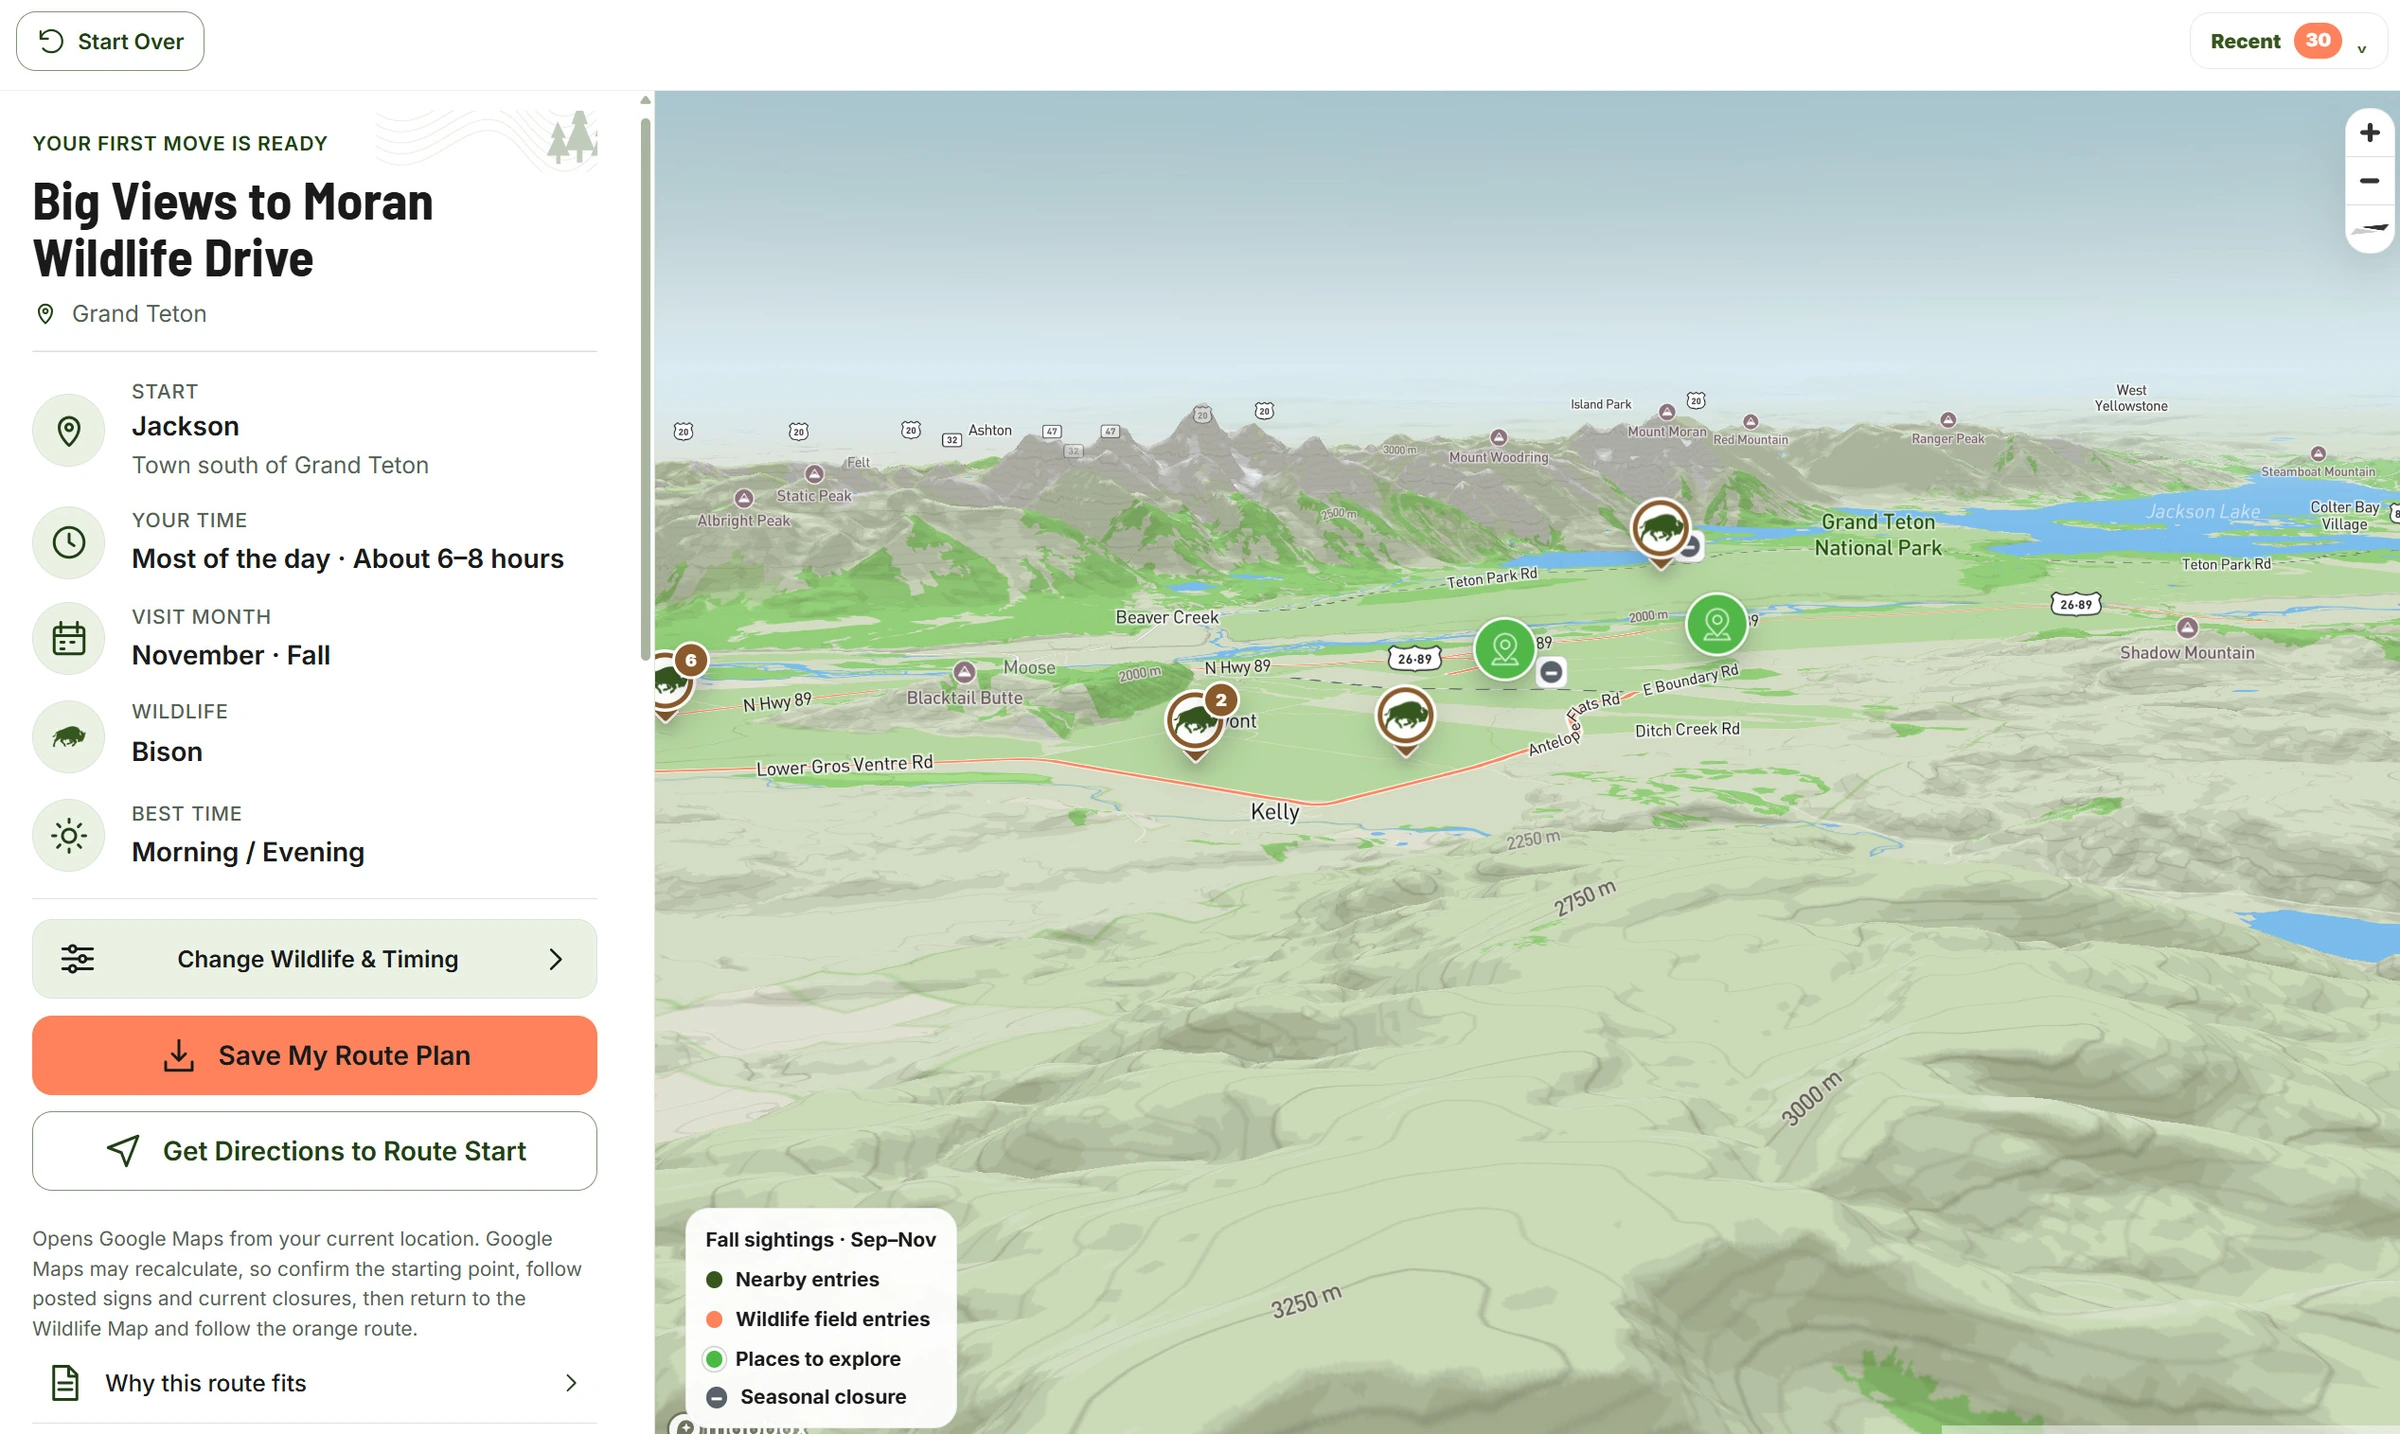
The sample starts with a morning bison drive from Jackson to Moran. Change the starting point or wildlife priority to see how the route changes.
Try the planner example
One Grand Teton sample route
Where The Wild Beasts Roam
A starting point, a wildlife priority, and a route to review.
Open meadows, habitat edges, and room to adjust the plan.
Portfolio sample layout · Not driving directions
From screen to saved plan
Visitors can download a personalized route PDF before leaving so they have the directions even if they lose service.
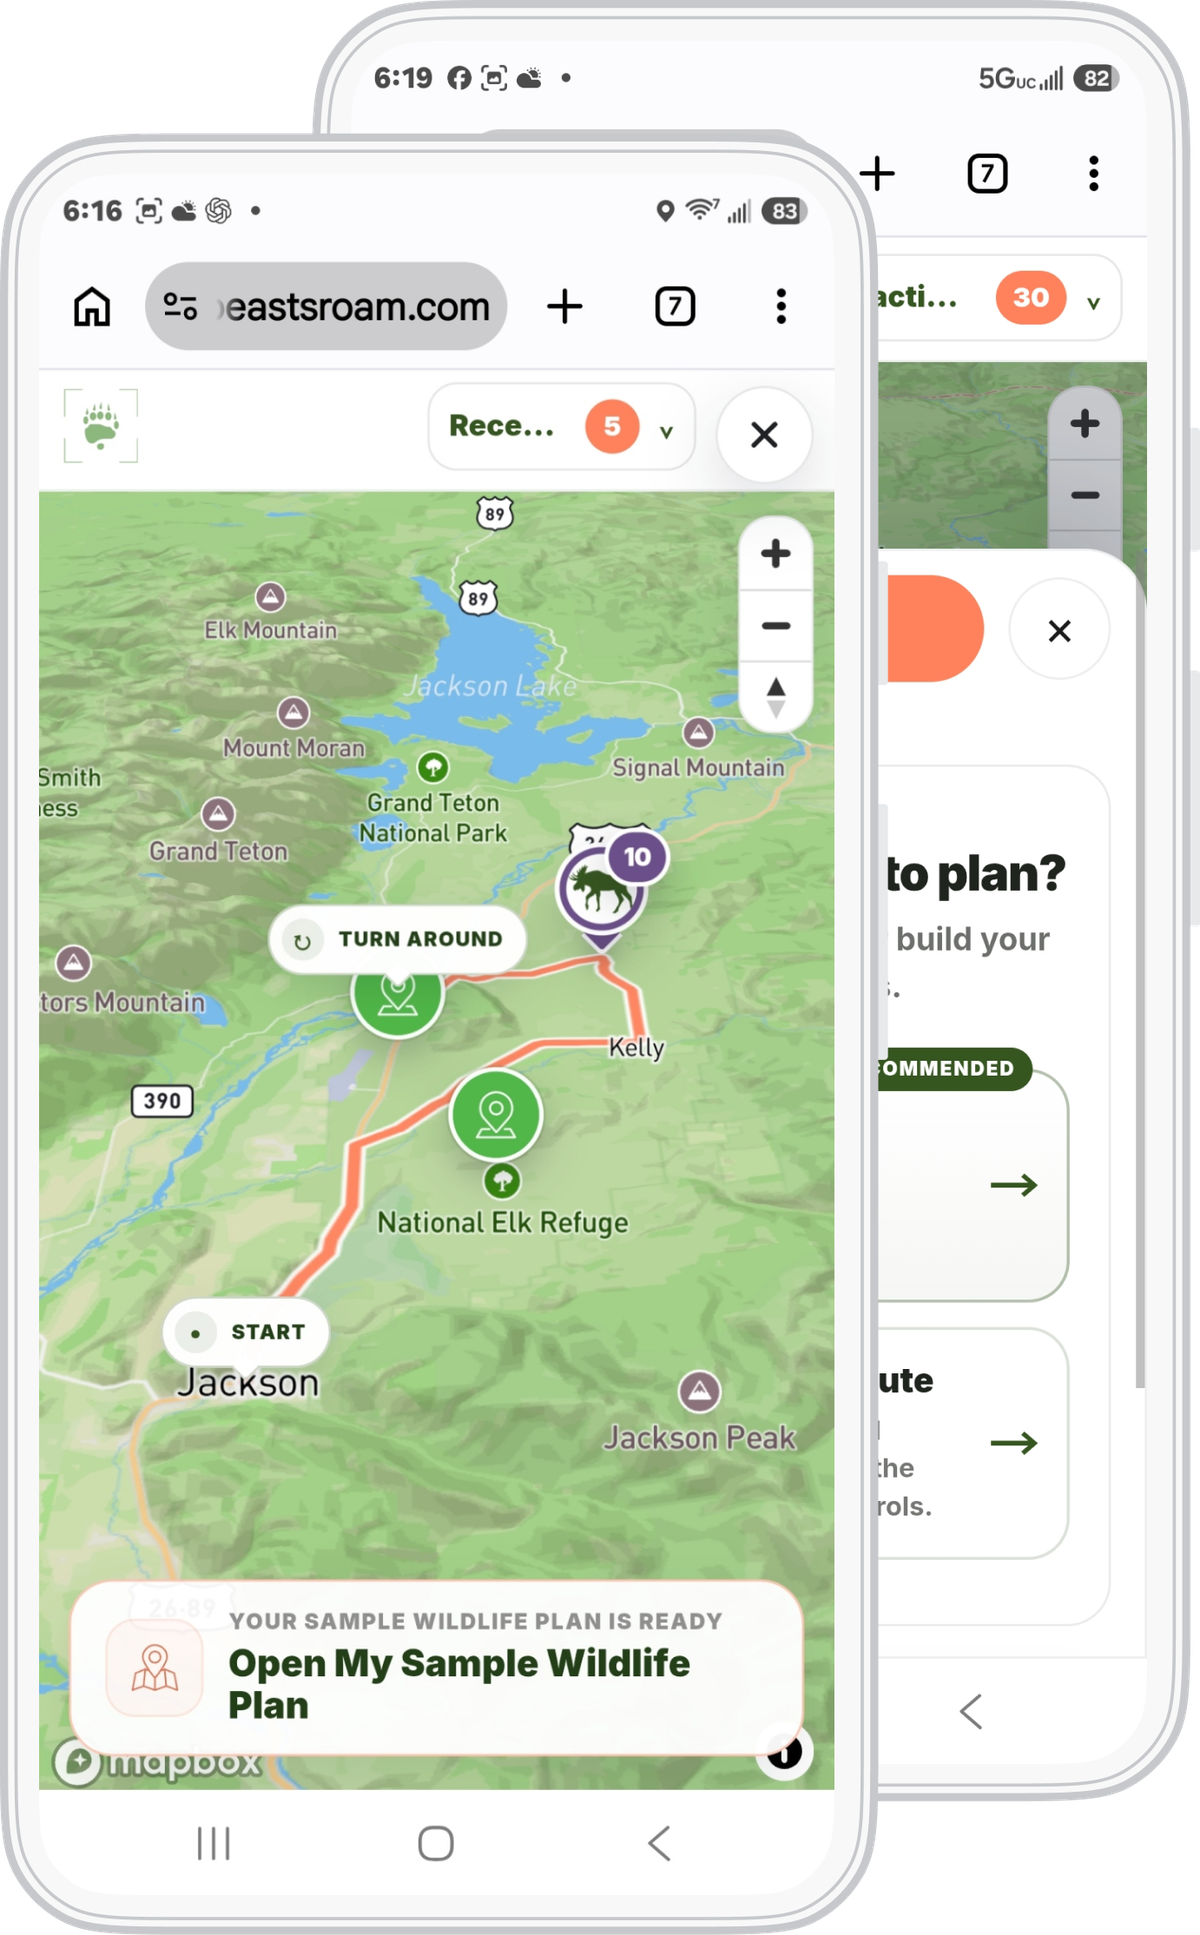
The sample opens with a morning bison drive in Grand Teton. Choose Change Sample Choices to try a different starting point or wildlife priority.
Markers show example observations, not current animal locations.
Open the sample in a new tab ↗
The first screen explains both ways to plan so visitors can choose where to start.
I put the drive estimate and wildlife priority beside the route so visitors could decide if it fit their trip before saving it.
Planner previews
Planning method
Sample route
Built on 14+ years of field knowledge in Yellowstone and Grand Teton.
Next: A route that fits the visitChapter 5 of 9
Compare the July and October routes and try the seasonal example.
Explore at your own pace.A route has to fit the season, the roads, and the choices someone has already made.
05 Routes that fit the visit
A route that works in July may need different stops or roads in October.
Released planner updates The seasonal observations, road-access fixes and plan-preservation changes below are part of the live planner.
The live planner
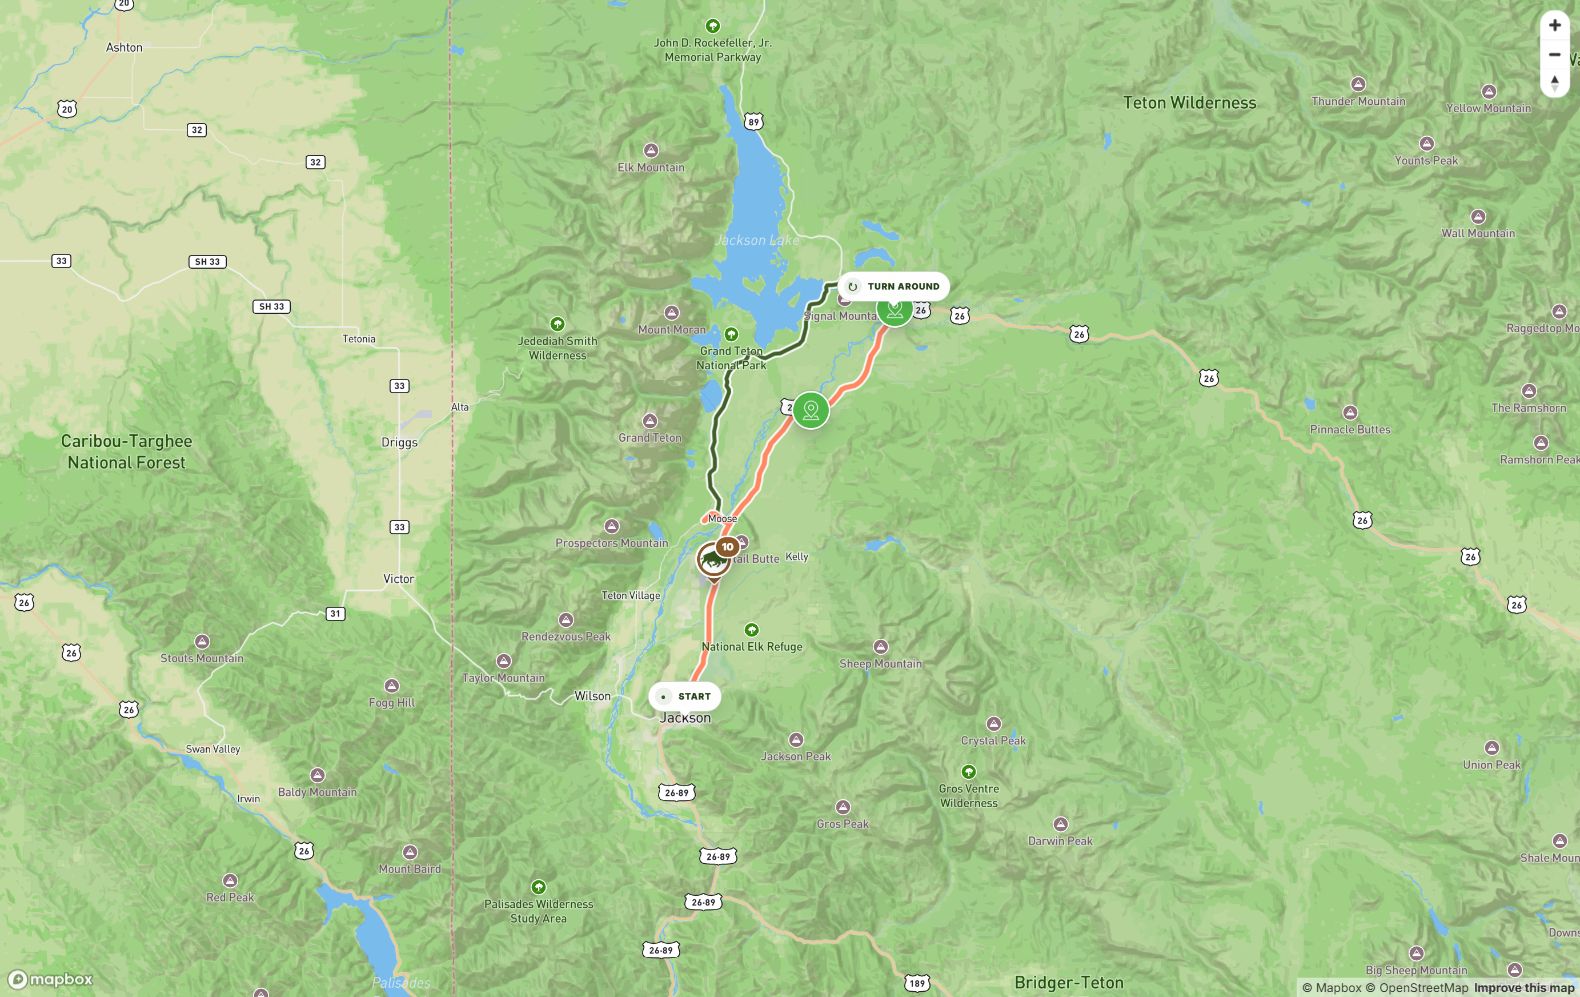
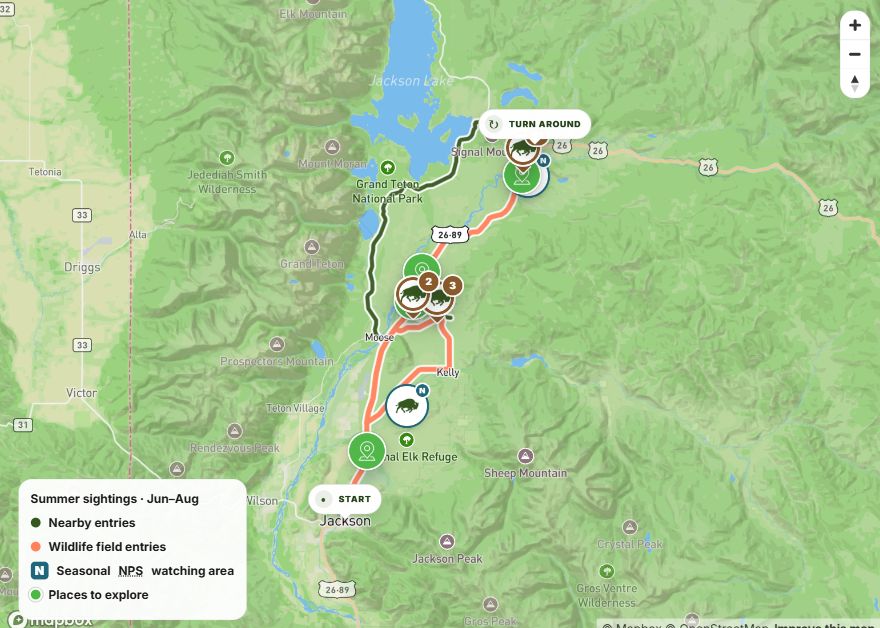
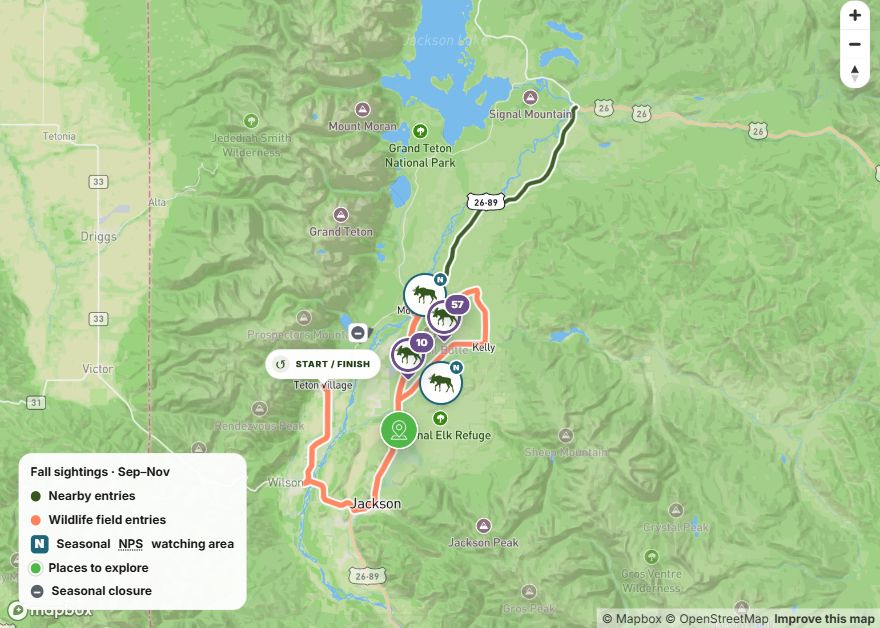
A July bison drive from Jackson and an October moose loop from Teton Village show how the planner adapts to the visit.
01 · Match the season
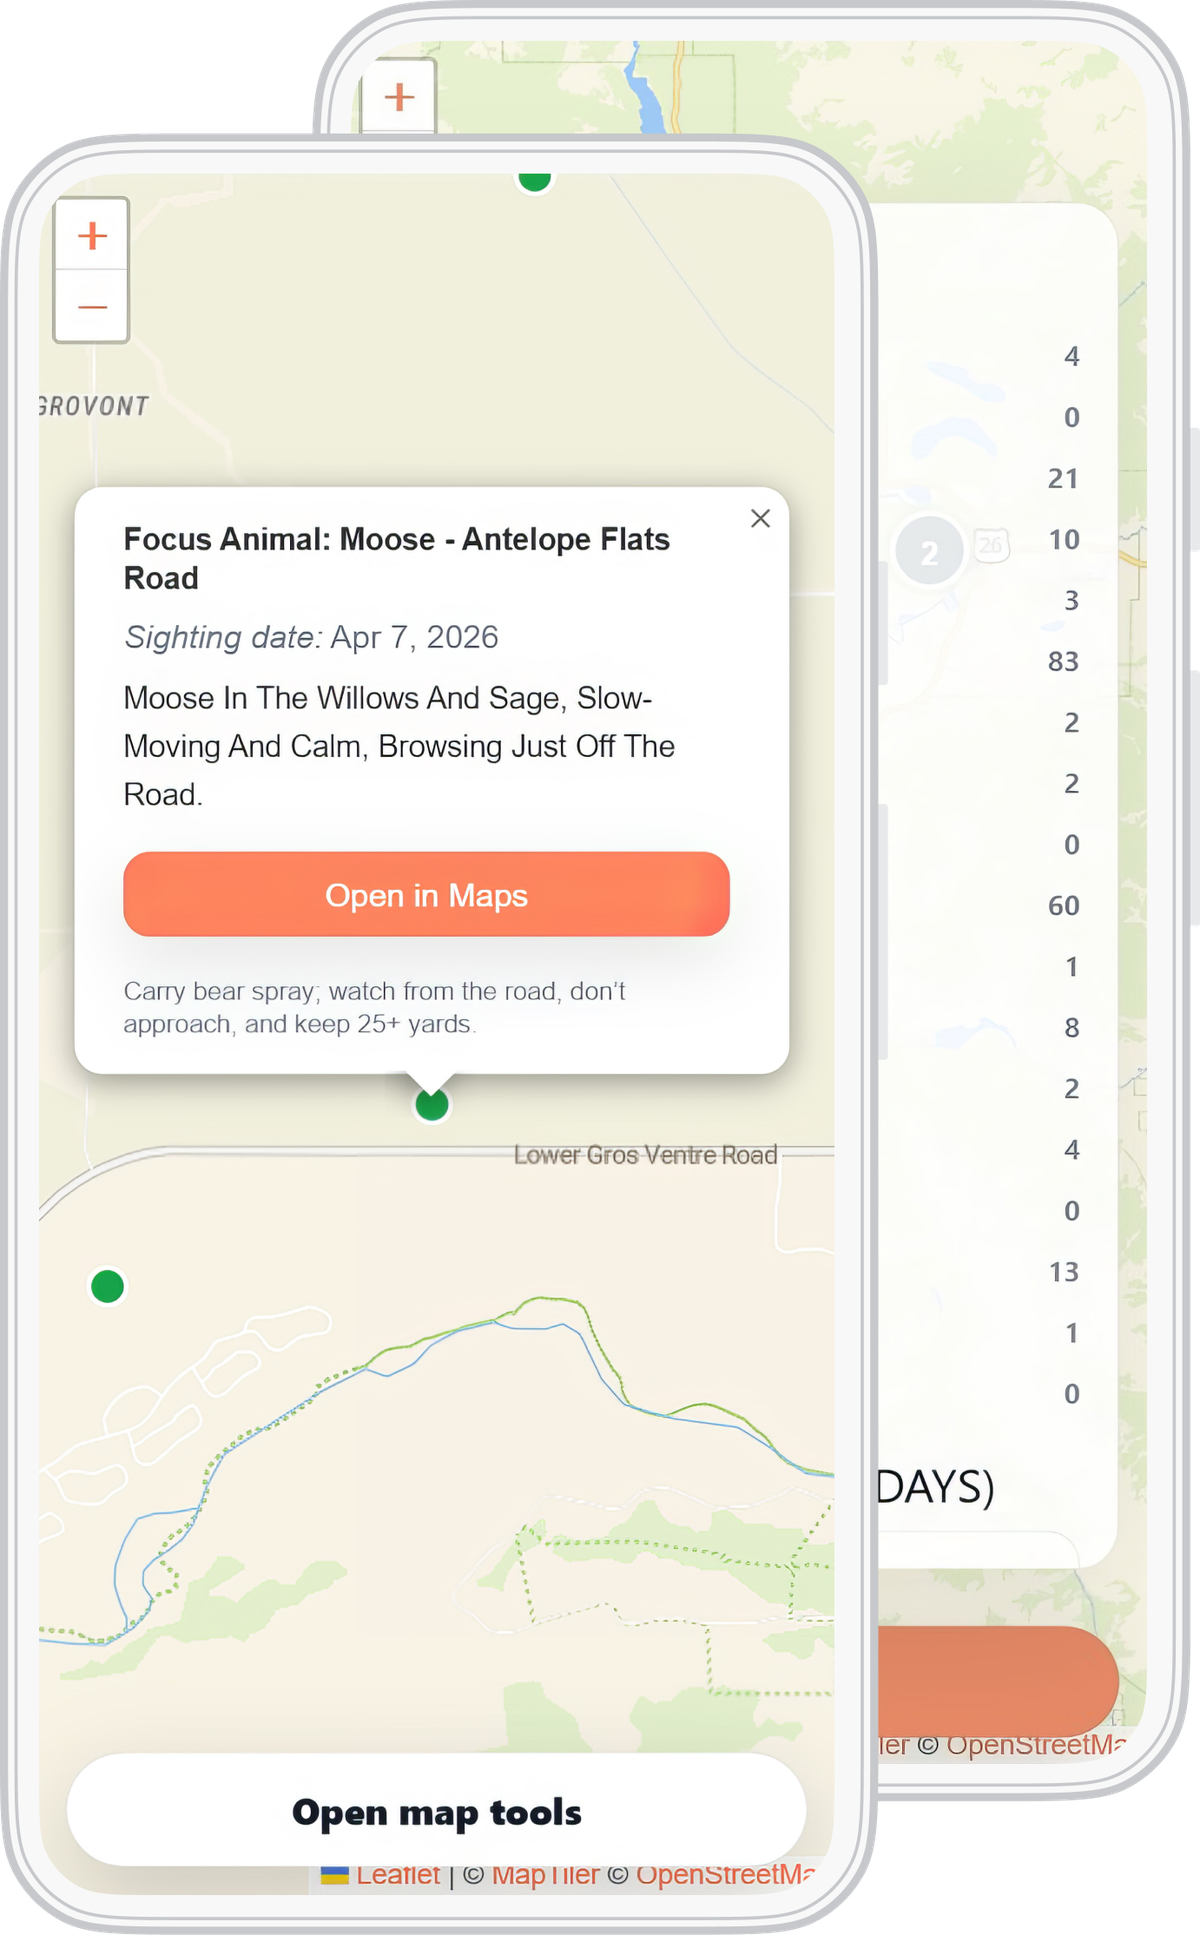
I updated the seasonal filter so October shows fall observations. Every note keeps its date. Park guidance stays separate from my sightings.
02 · Respect road access
An October test route crossed a closed road. I changed the approach through Wilson and Jackson, kept the closure check, and matched the printable directions to the corrected route.
03 · Protect the plan
Opening a field note from another park could reset the park in someone’s plan. I fixed that so visitors can read the note without losing the route, month, wildlife choices, and stops they’ve already entered.
A change in the map
Choose October to see how the map narrows the notes to fall observations.
Notes from different seasons appear together.
October shows fall observations: September–November.
I kept my observations, park guidance, and road rules separate so visitors could see what each one tells them.
The selected month filters dated field observations to that season.
Park guidance describes habitats and areas to consider. It stays separate from individual sightings.
Road rules check access. I also check that the map and printable directions agree.
Field notes show dated observations, not live animal locations. I kept dates and distance reminders beside the choices people make.
Chapter 6 of 9
Compare the websites, then explore the heatmap review and page wireframe.
Explore at your own pace.Once the product was working, the website needed to show what people could actually use.
06 Website redesign
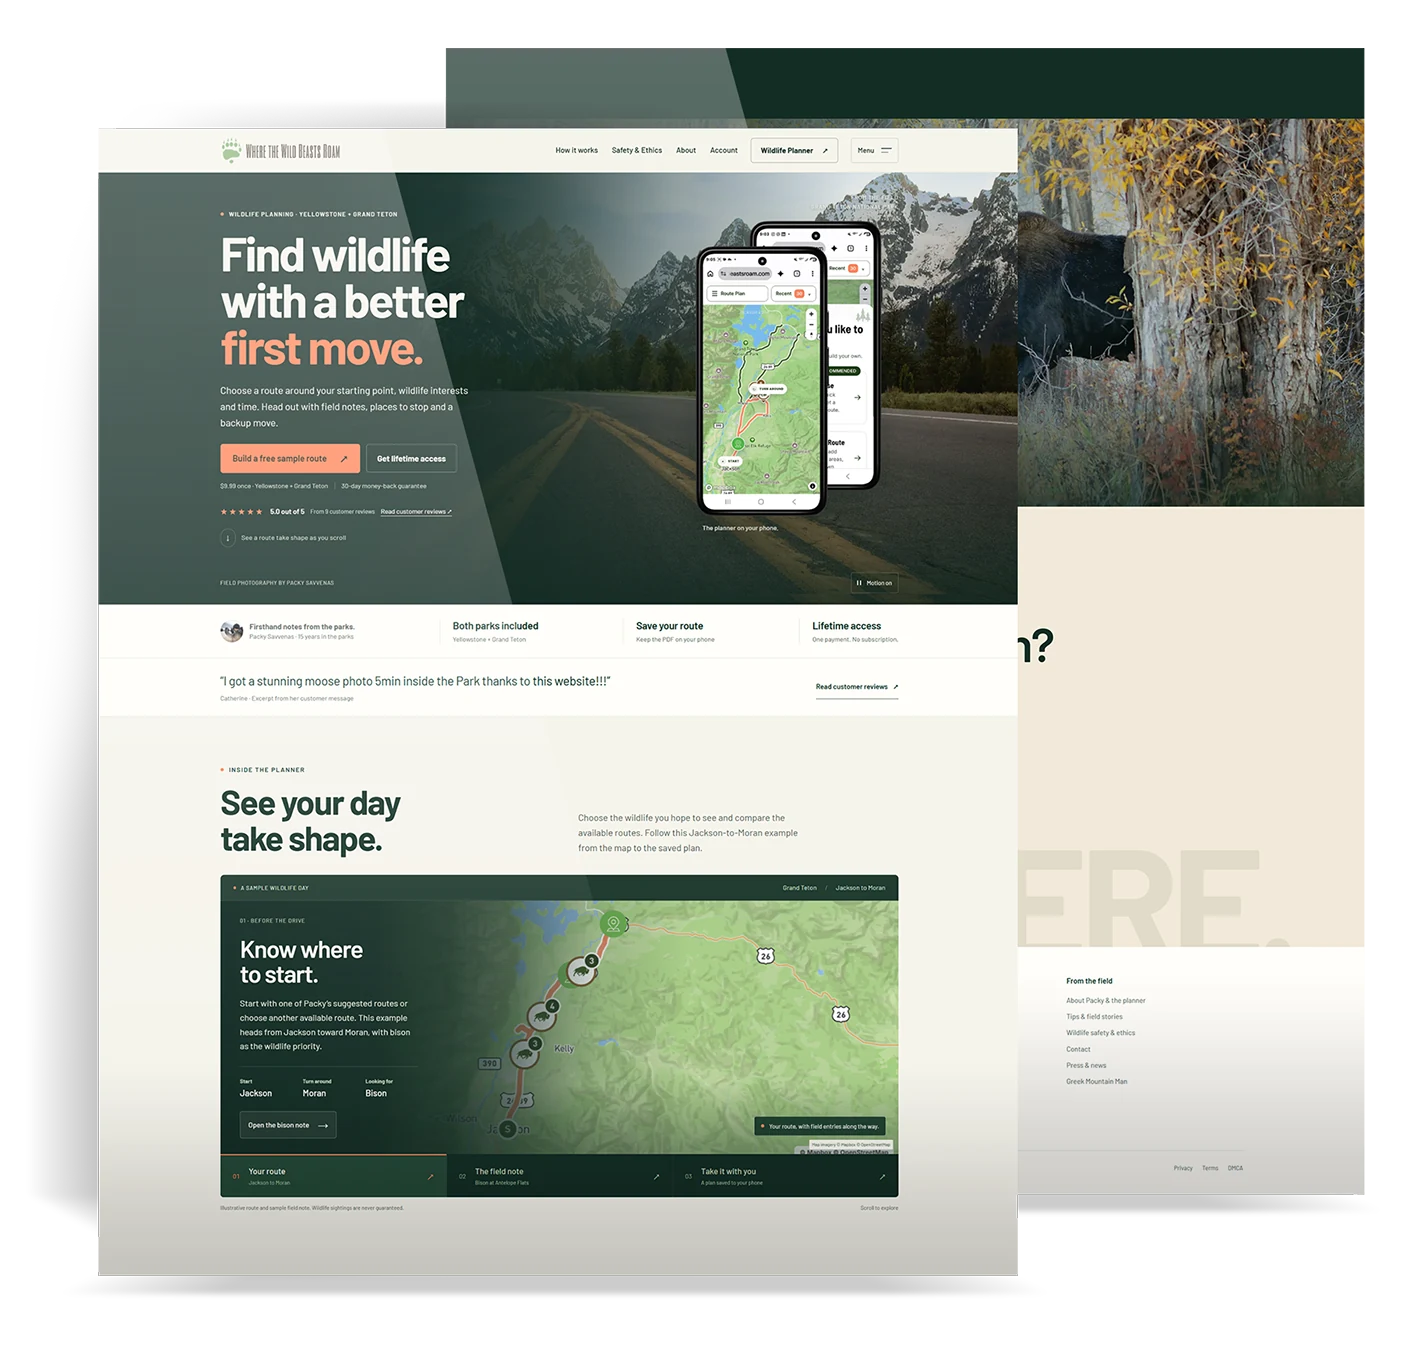
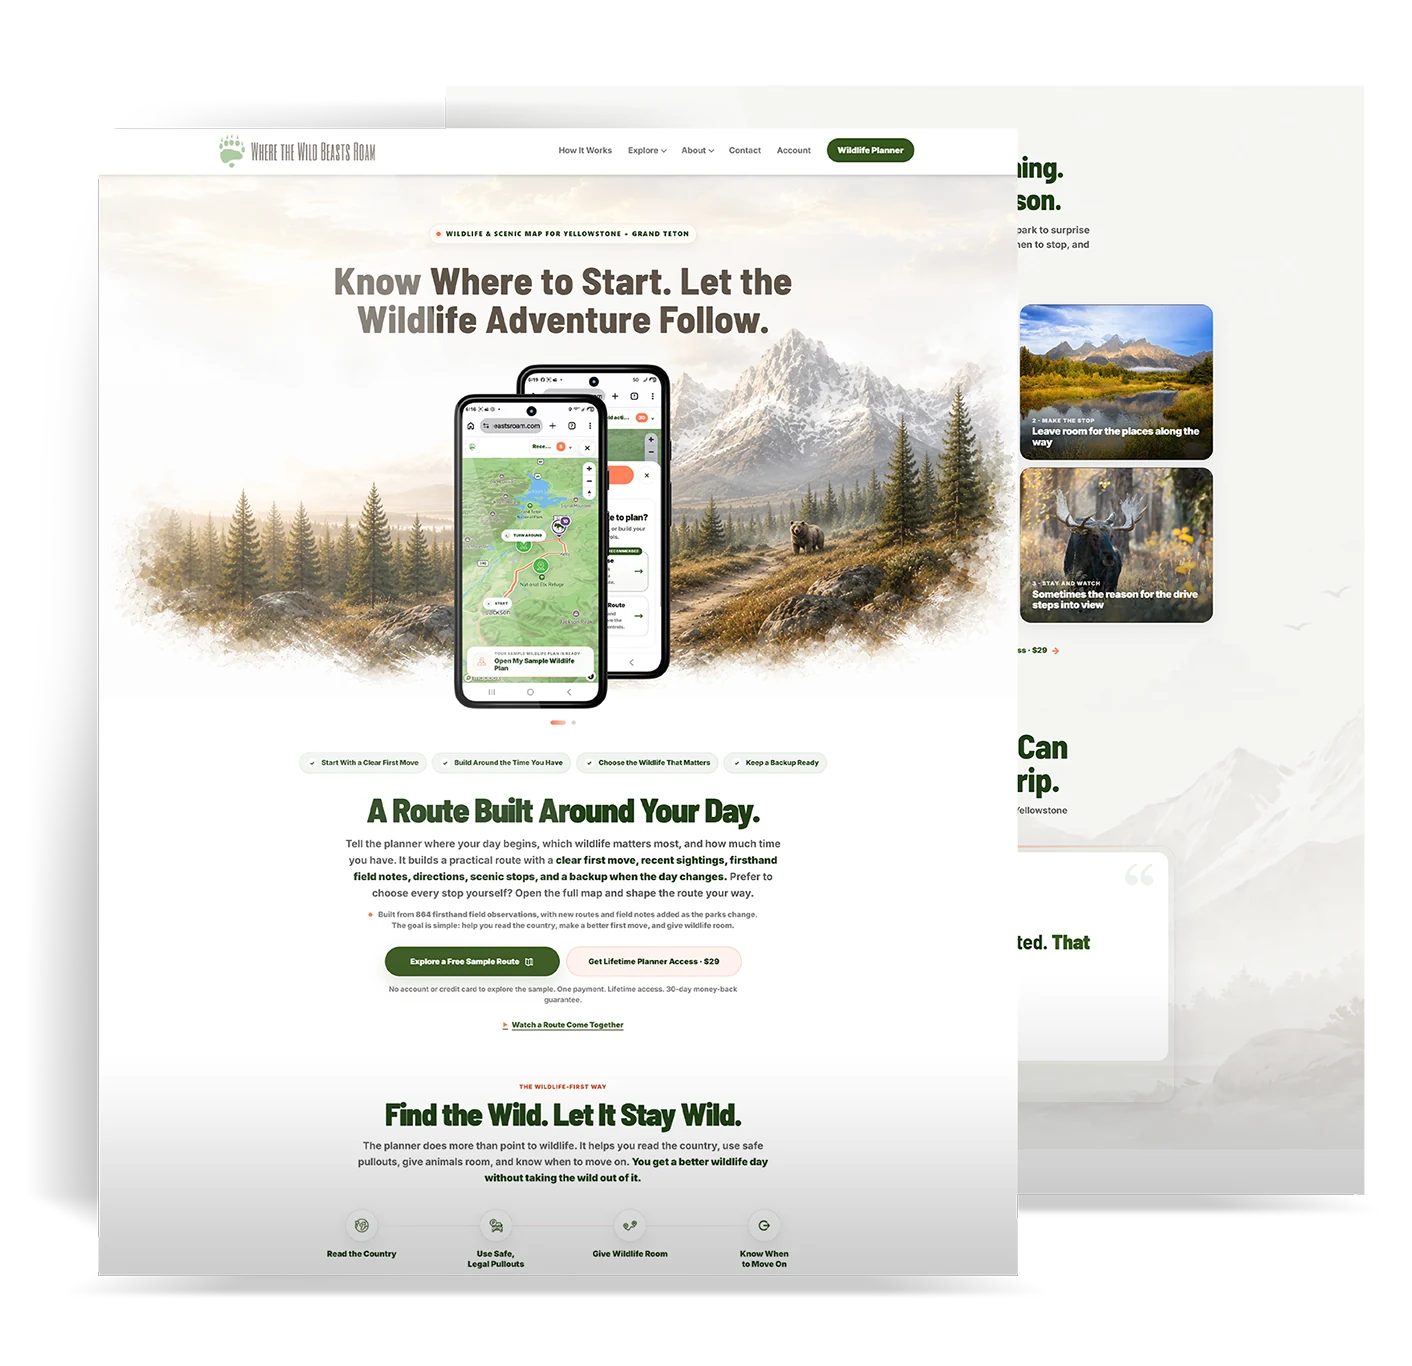
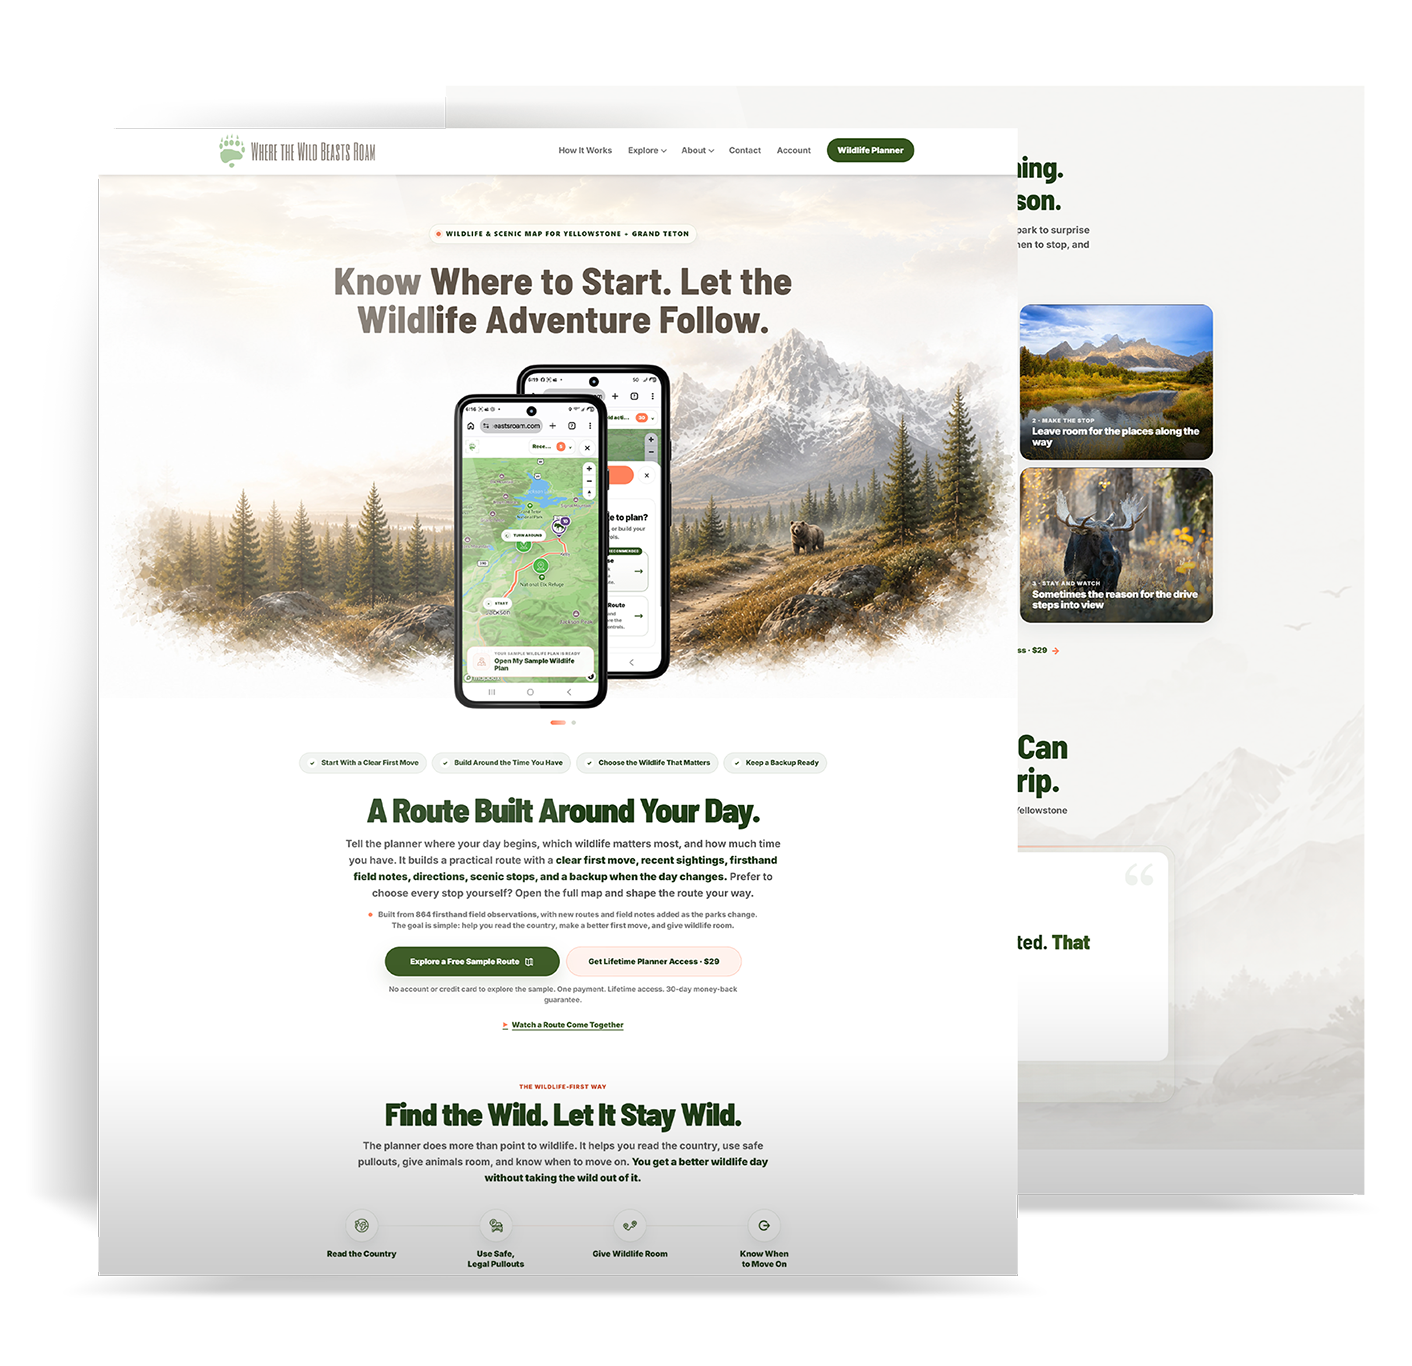
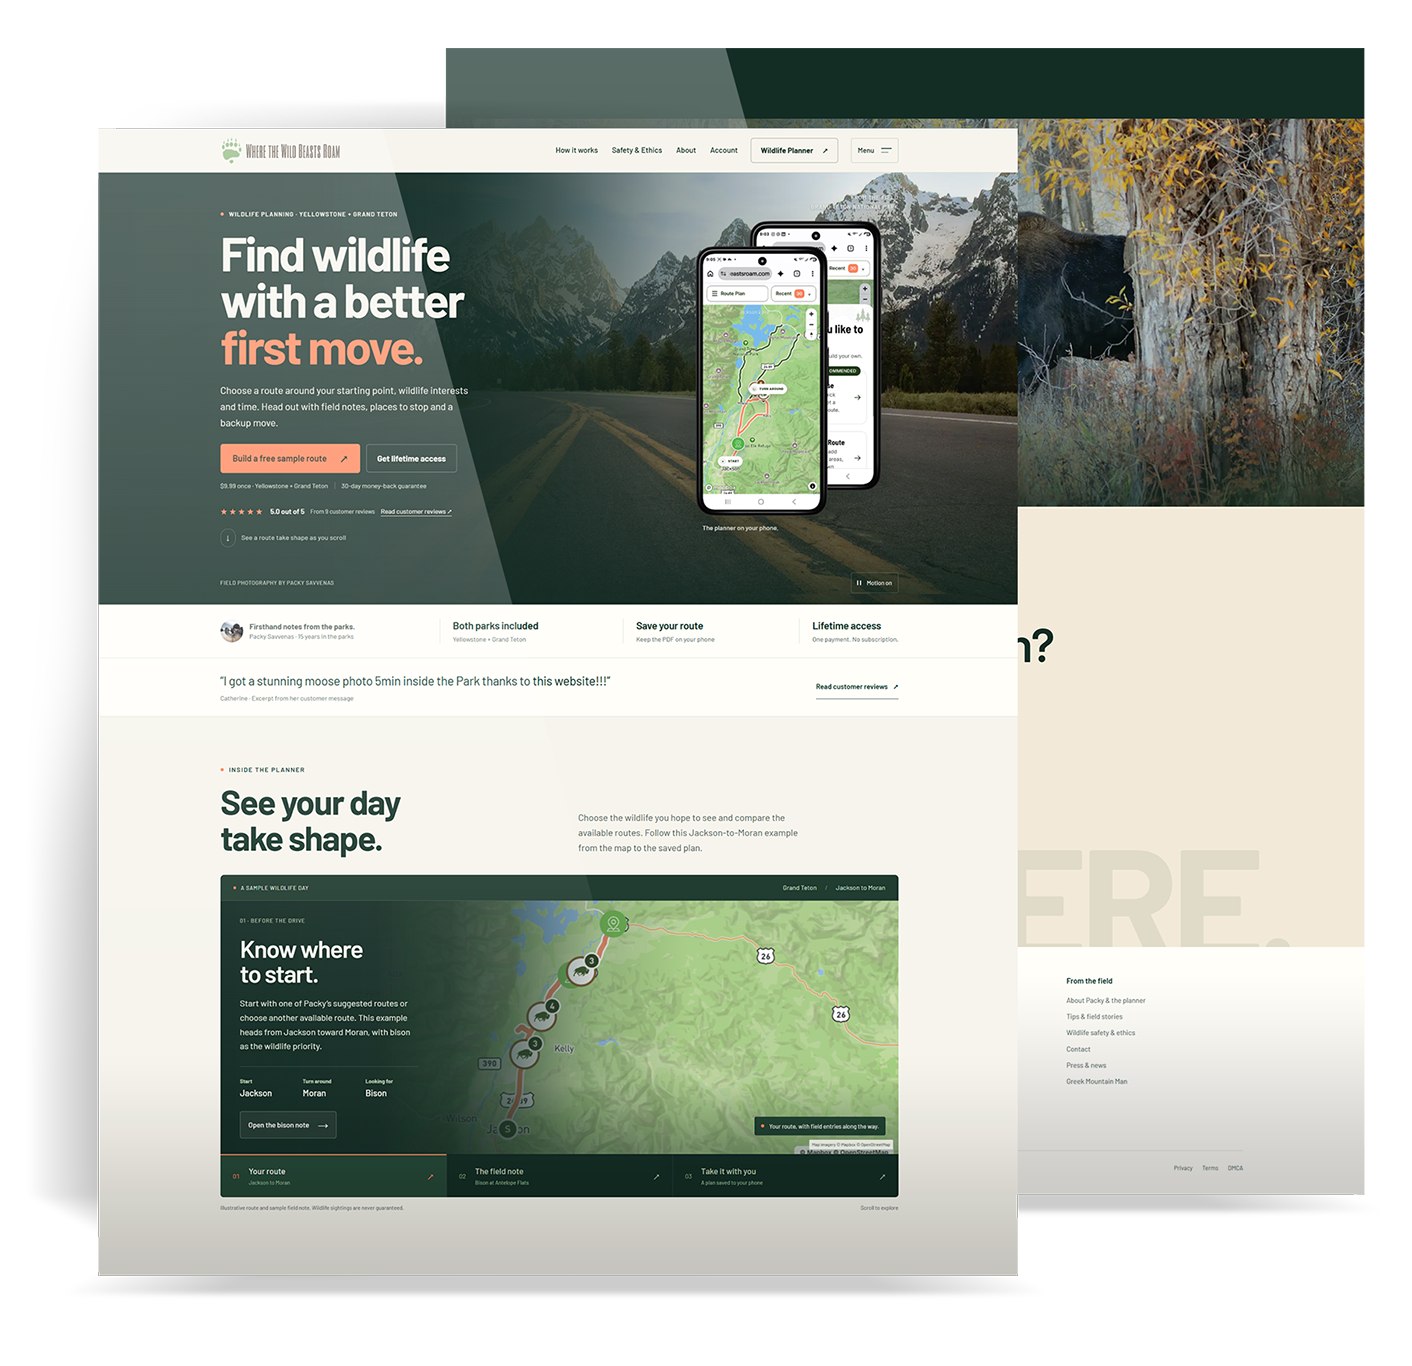
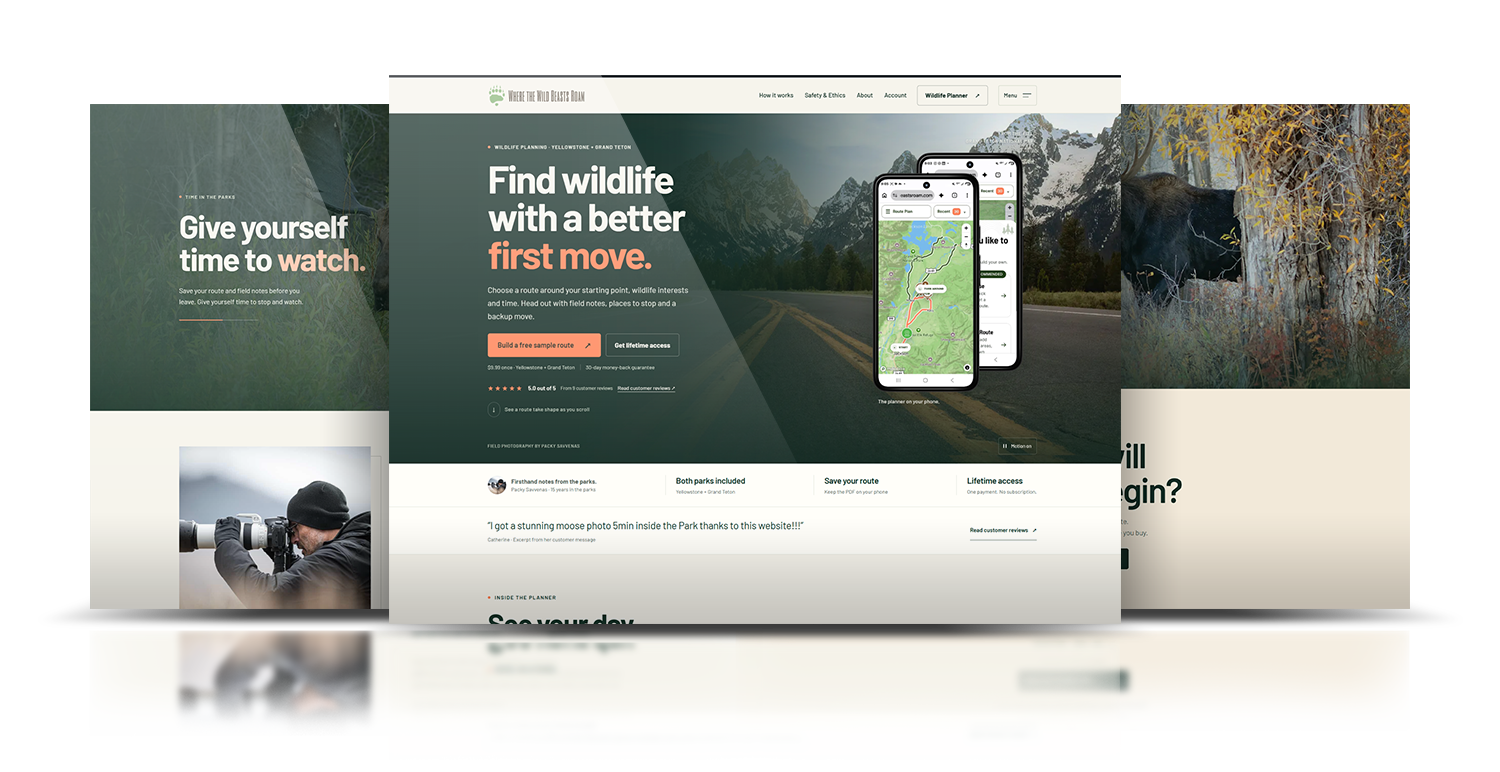
Once people were paying to use the planner, I went back to the website. I had used AI to build the first site while I focused on the product. It explained too much before showing what people could do. I rebuilt it around the planner, put the sample route up front, and used my own photography so people could see and try it before they buy it.
Compare the homepages


Previous website

Redesigned website

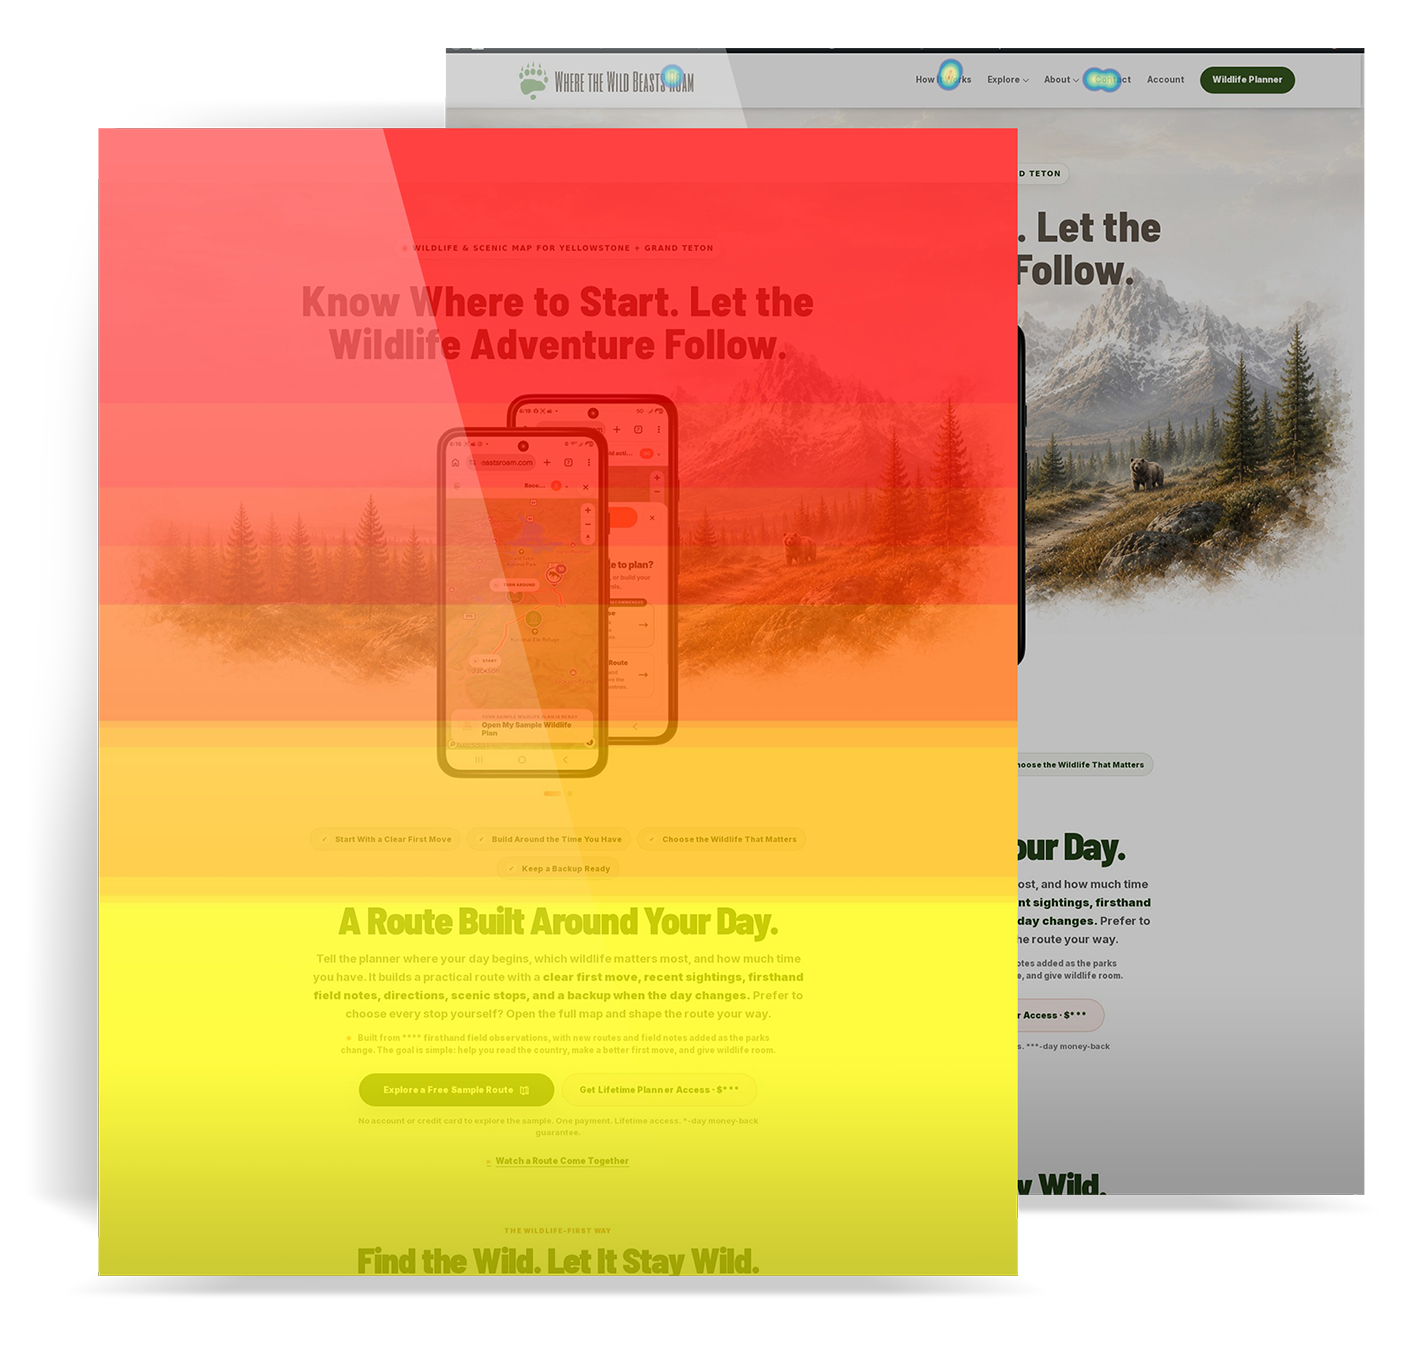
I reviewed the old website in Hotjar alongside the website tests. I wanted to see where people clicked, how far they scrolled, and what needed a closer look.
Previous website · Heatmap review
I looked at where people clicked and how far they scrolled on the old homepage.
I compared the maps with session recordings and website tests to understand how people used the page.
These maps are from the previous website. They show clicks and scroll reach, not what someone read or why they bought.
People wanted to see a useful route and understand what they’d get. I moved the sample higher so they could see a finished plan before deciding whether to buy. The page now shows the plan, then explains how to try it.
Wireframe logic
Show the route, explain how it fits a trip, then make the next step clear. This reconstruction shows how I ordered the page.
Choose a tab to see where each part belongs on the page.
For the website rebuild, I wrote rules for page order, photography, product graphics, and mobile layout. I turned those rules into reusable AI skills, then reviewed the pages and kept refining them against those rules.

The redesigned public pages are live. Mobile and account refinements continue.
Chapter 7 of 9
Follow the path from a first visit to a sample, purchase, and return to the planner.
Explore at your own pace.People need to see what they’re buying and know how to get back to it.
07 Responsive website
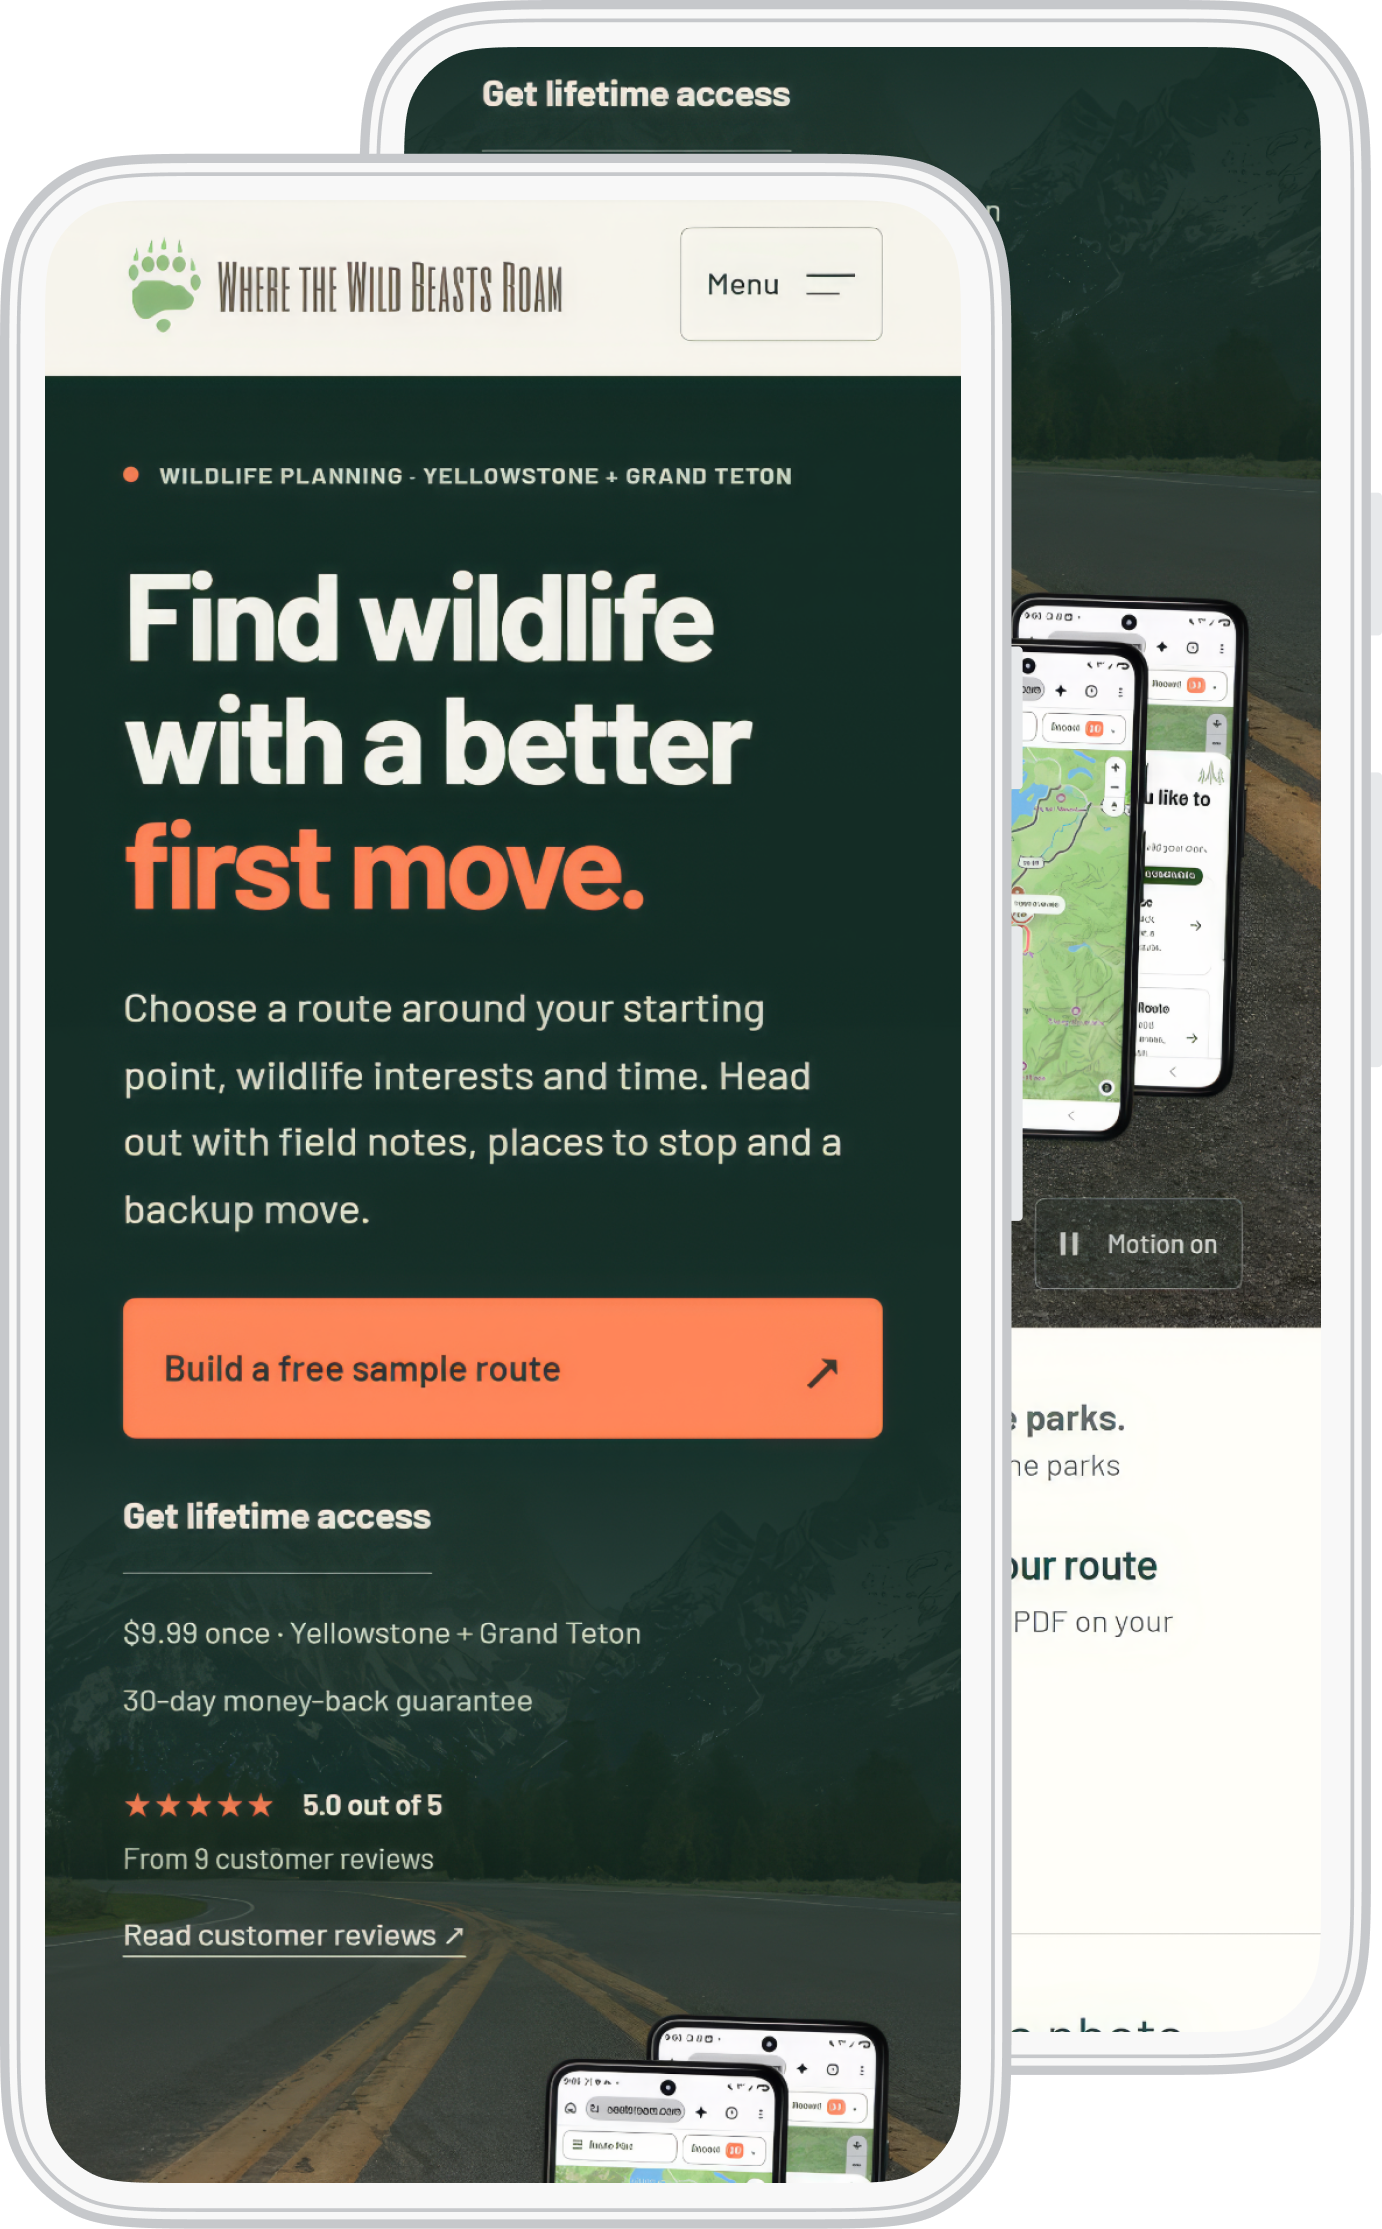
Most visitors use a phone. Facebook is my only ad channel. I designed the page for someone opening it on a phone for the first time.

I kept the photography and shortened the copy so new visitors could reach a sample route near the top. Returning customers have a separate place to sign in.
I use Hotjar recordings and analytics to review how visitors move through the page and decide what to revise.
07 Access and return
I worked through what happens after checkout, too. Customers can sign in and get ready for another drive.
From first look to the next drive
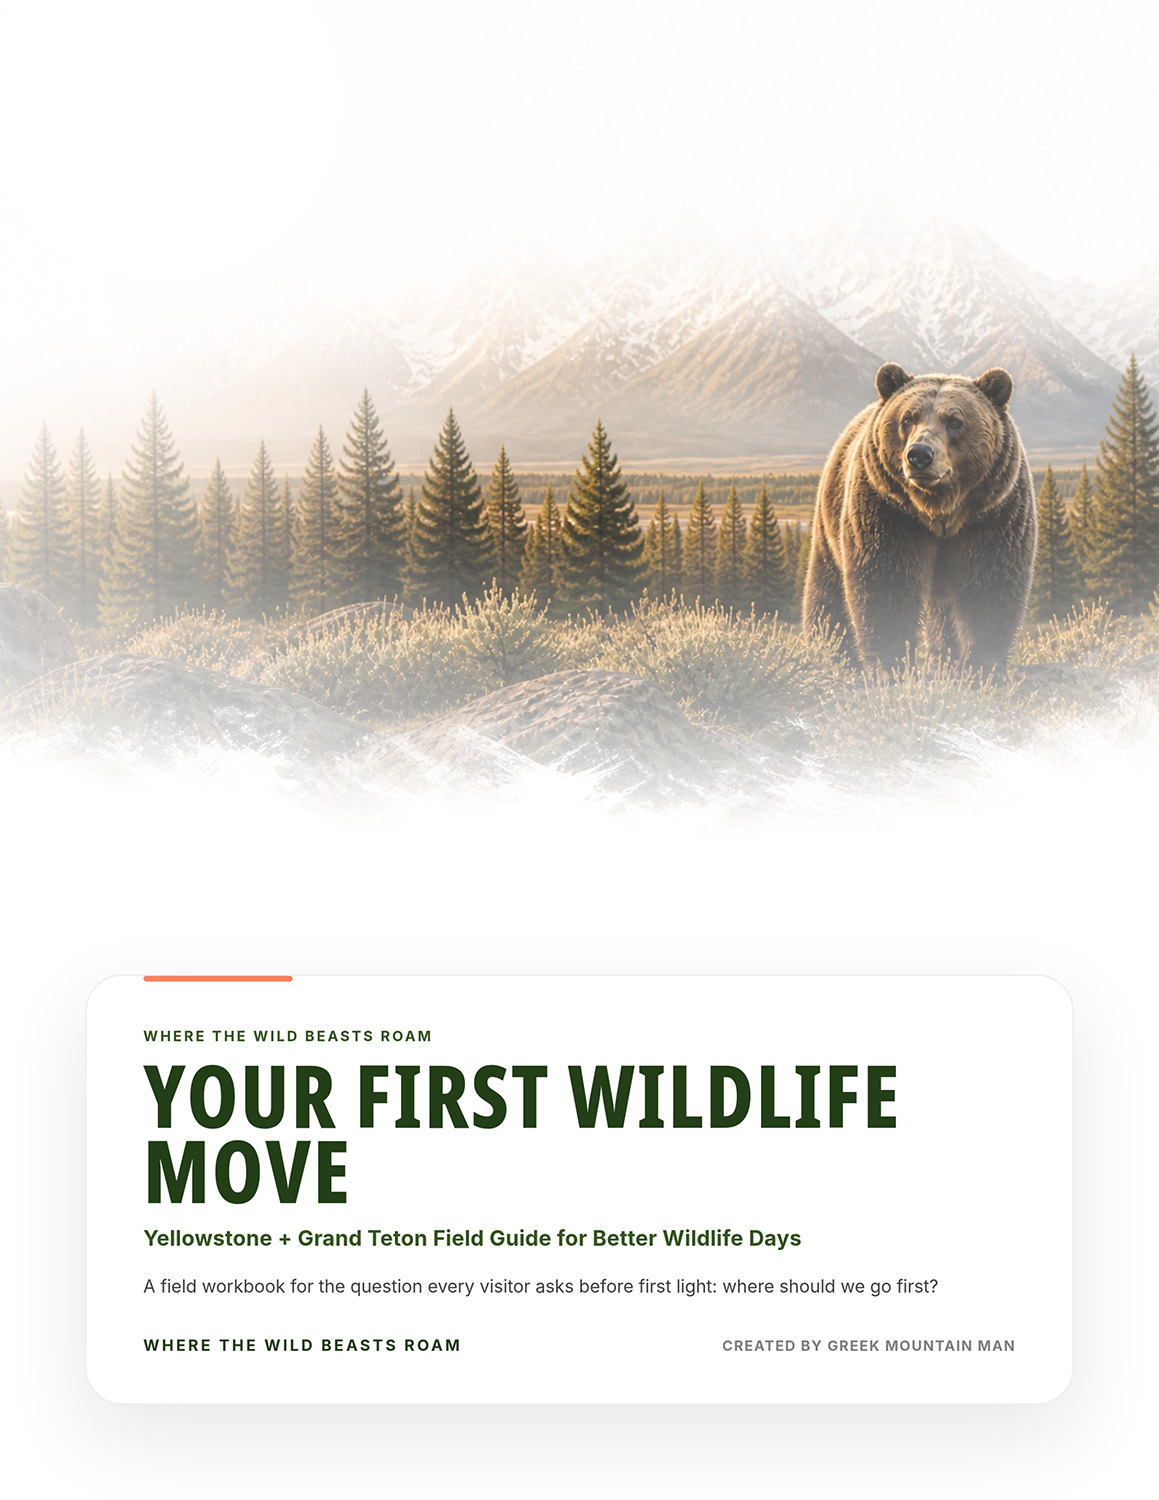
Customers can open the planner, map guide, and field-guide downloads from the same account.
Try a route and see the plan before buying access.
Get access to the Yellowstone and Grand Teton planner.
Return to the planner, map guide, and field-guide downloads.
I connected the sample, checkout, account, and planner so people could try it, buy access, and come back for another drive.
Chapter 8 of 9
See the live product, customer feedback, and how I keep working on it.
Explore at your own pace.I keep supporting the planner and fixing problems as people use it.
08 What people can use today
People are buying and using the planner. People can use the planner, try the sample route, and save a PDF. I use their feedback, website recordings, and analytics to decide what needs work next.
Customer evidence
Catherine shared on the live site that she used the planner to find moose in Grand Teton and recommended it to others.
Catherine’s reported experience. Wildlife sightings are not guaranteed.
Read the customer feedback on the live site (opens in a new tab)Working product
The public sample includes a route, directions, wildlife notes, and a PDF option.
Open the live sample plan (opens in a new tab)Agents monitor the site, help me troubleshoot programming issues, and draft customer replies that I review and send. In the field, I pin an observation on a map and email the location. An agent turns that email into a WordPress draft. I add the location details, review the entry, and publish it.
I use analytics and Hotjar on the website. Next, I want to track these questions through the planner:
Route completion. How many visitors reach and save a route?
Time to a plan. Where do visitors get stuck, and how long does planning take?
Sample to purchase. How many people buy after trying the sample?
Return use. How many buyers plan another drive?
I already use website behavior to decide what to change. The planner measures above are still planned; I’m not reporting results for them yet.
Chapter 9 of 9
See how I took the photography experience into a game.
Explore at your own pace.The game builds on the same experience in the parks that led to the planner.
The next product
The planner helps people decide where to go. The game gives them a way to try camera settings and see what changes in the photograph.
People can work through shutter speed, aperture, ISO, and focus in wildlife scenes. I’ve finished the game. I’ll add a closer look at how I built it to this case study next.