Where the Wild Beasts Roam / Wildlife camera game
Product design + developmentI designed and built a wildlife camera game.
I turned my wildlife photography experience into a game where people can change camera settings, take a photo and see the result. I designed the lessons and interface and used AI to help write and refine the code. Existing paid members of Where the Wild Beasts Roam can play it from their account page.
See how I built it Explore the planner case study ↗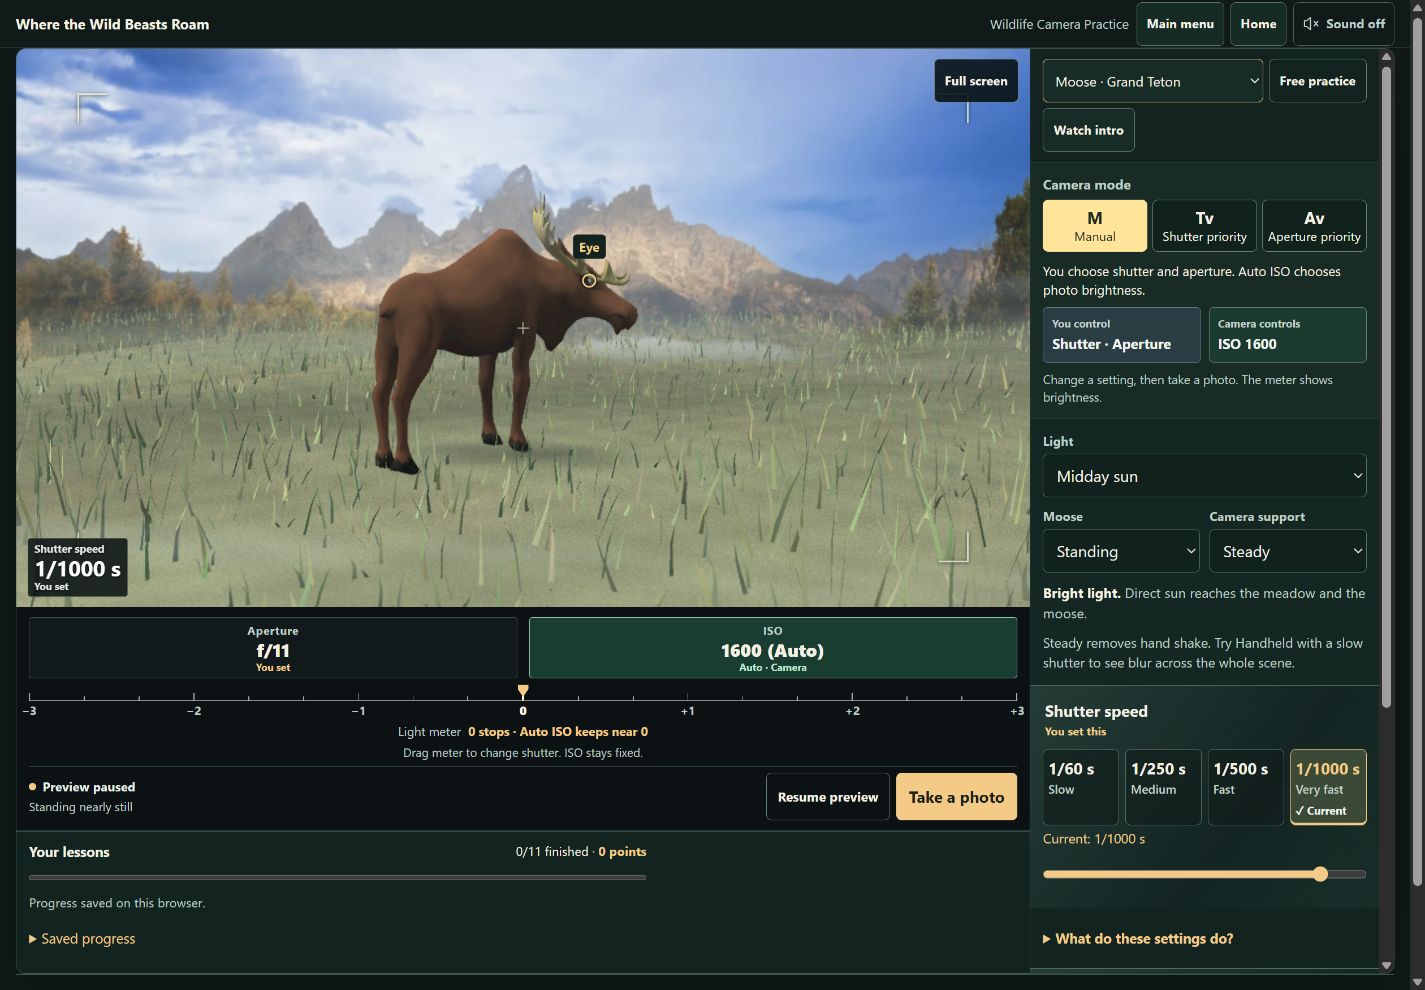
2 wildlife scenes / 11 guided lessons / Free practice / Paid-member access
The planner helps people plan the drive. The game gives them a place to practice camera settings before the trip.
Chapter 1 of 6
Why I built itI wanted people to try the settings before they were out in the field.
When I’m photographing wildlife, I watch the light, the animal’s movement and where to focus. I wanted people to practice those choices and see the result without needing a camera or a trip to the parks.
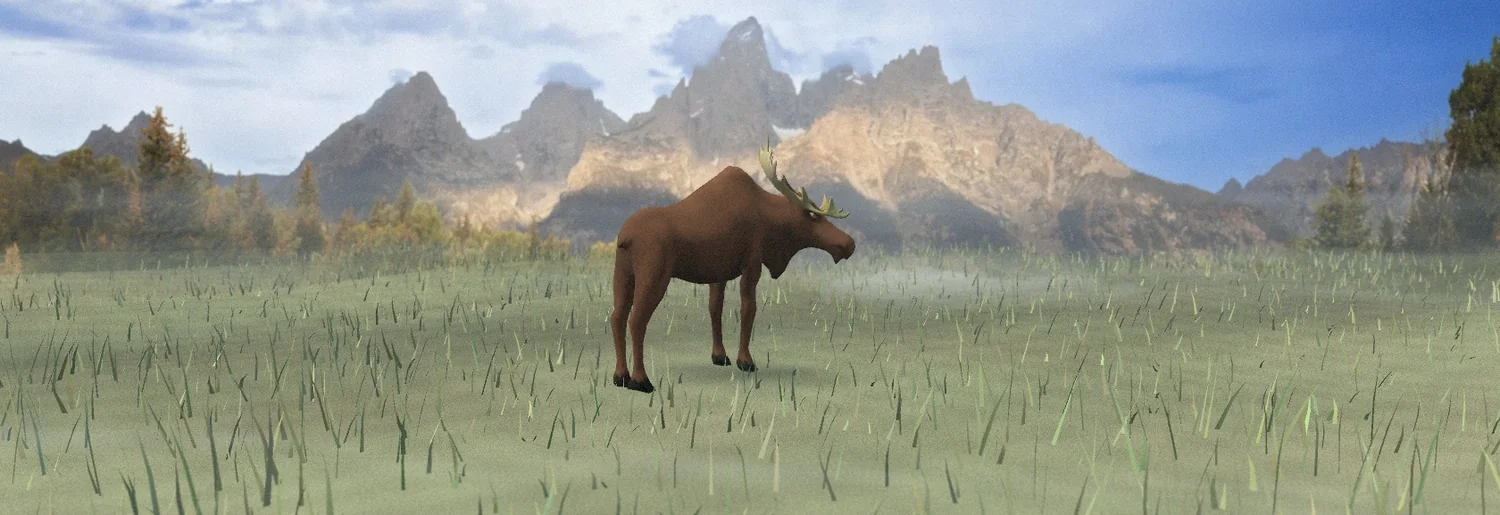
The game has a grizzly scene at Old Faithful and a moose scene in Grand Teton. People can follow a lesson or use free practice to change settings and try again.
See the moment. Make a choice. Look at the photo.
Watch the light and the animal.
Work through a camera choice.
See what happened and try again.
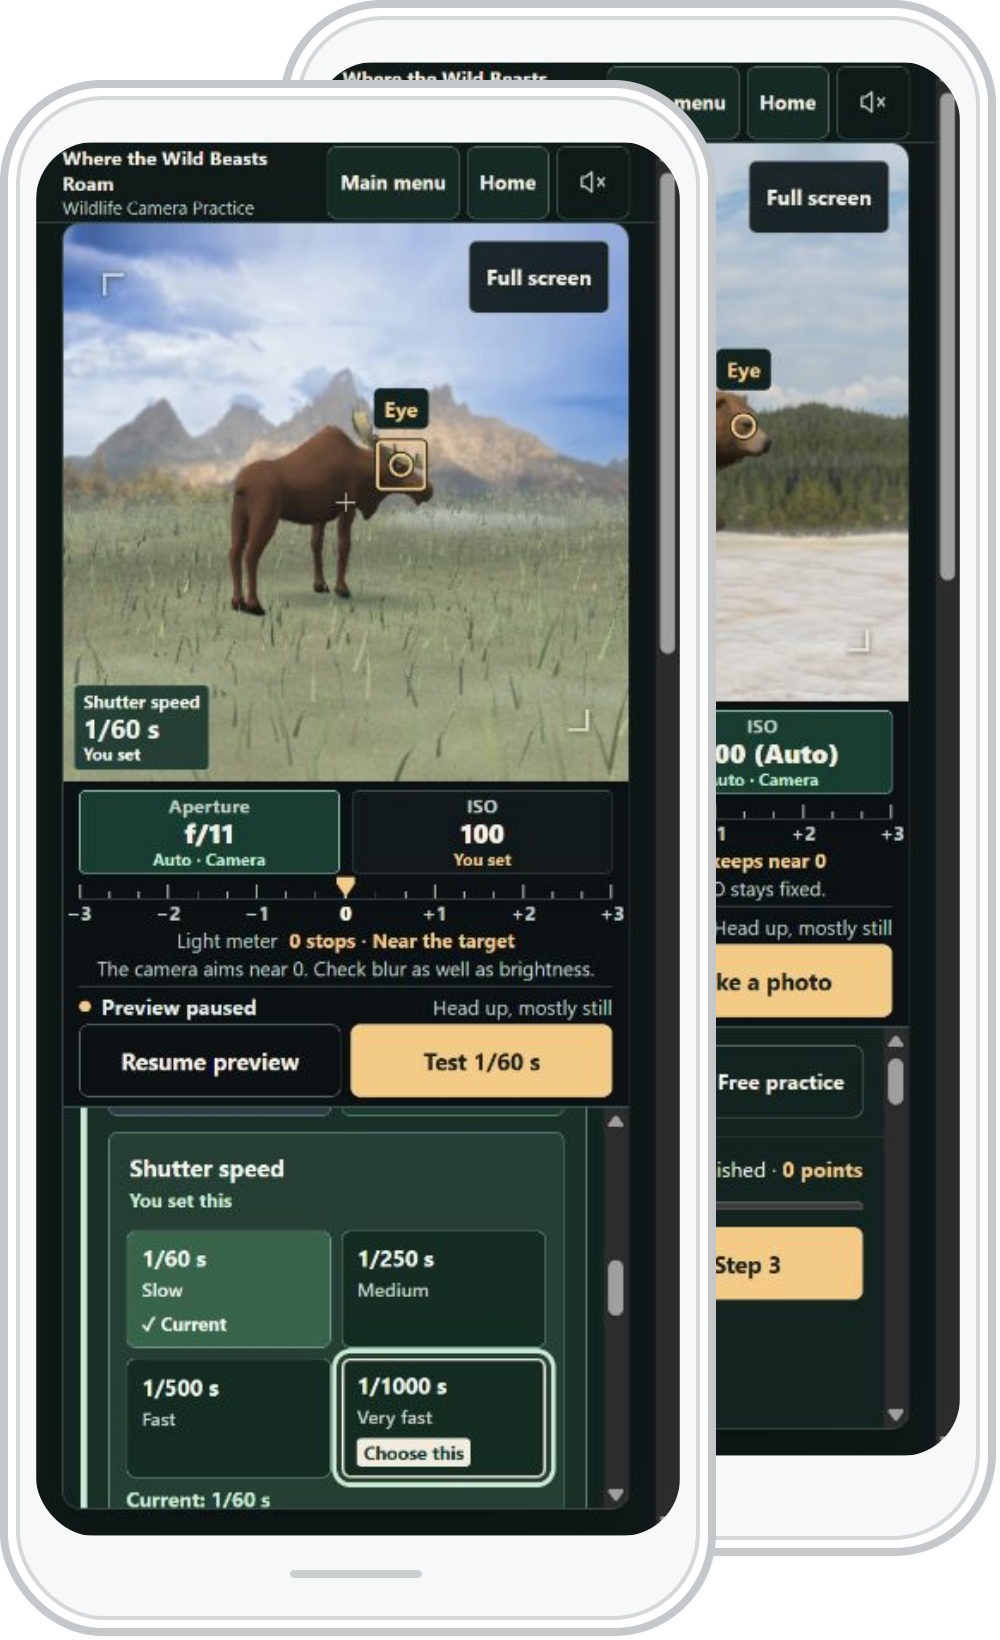
Current game screens and a screenshot of a saved game photo. These illustrate the loop; they are not three consecutive moments from one playthrough.
Show what the setting changes in the photo.
Chapter 2 of 6
One setting at a timeI put the control beside the instruction.
The game has shutter speed, aperture, ISO, light, movement and focus. Putting all of that in front of someone at once made the first lesson harder to follow.
I gave each lesson a specific choice. In the shutter lesson, someone selects 1/60 second, takes a photo, then tries 1/1000. The control sits beside the instruction, and both photos stay together for comparison. I marked the selected setting as “Current” and the next setting to try as “Choose this,” so people can tell where they are and what to do next.
Choose a setting, then inspect its effect.
This example recreates the working game’s lesson flow. Choose a step or work through it in order.

Choose 1/60 second, then take a test photo.
Two test photos, kept together
The game replays the same head movement. Auto ISO keeps the brightness comparable.
The illustrated photos show where the comparison belongs in the flow.
Start with one camera choice.
The instruction names a setting and puts its control beside it. Someone can make the choice without searching through the other controls.
The current shutter setting is marked “Current.” The game keeps the scene, camera readings, controls, and browser-local progress together.
These current screens show the lesson menu, camera controls, and a completed shutter comparison. They illustrate the flow rather than one consecutive playthrough. Captured from an isolated copy of released version 0.2.13.
Eleven guided lessons
- Meet shutter speed
- Meet ISO
- Meet aperture
- Read the light meter
- Choose your focus
- Beat the blur
- Catch the pause
- Balance shutter and ISO
- Get the shot
- Try shutter priority
- Try aperture priority
I added shutter-priority and aperture-priority practice, bringing the game to eleven guided lessons. Each new lesson follows five steps: choose a setting, take a photo, change the setting, take another photo, and compare them. Free practice lets people try their own choices outside the lessons.
Manual (M). People choose shutter speed and aperture, with Auto ISO available. Shutter priority (Tv). They choose the shutter speed and the camera chooses the aperture. Aperture priority (Av). They choose the aperture and the camera chooses the shutter speed. ISO stays fixed in the two priority modes. The screen shows “You control” and “Camera controls,” with automatic settings visible but read-only.
I put the real control beside the explanation and showed the result in the photo.
Chapter 3 of 6
Make the difference visibleI made the photo comparisons repeatable.
A slow-shutter photo could look sharp if the animal was still. Comparing it with a different moving moment made the shutter lesson harder to explain.
I changed the guided test to replay the same head movement for both photos. Someone can compare shutter speeds without comparing two different moments. In the timing lesson, they watch the animal and choose when to take the photo themselves.
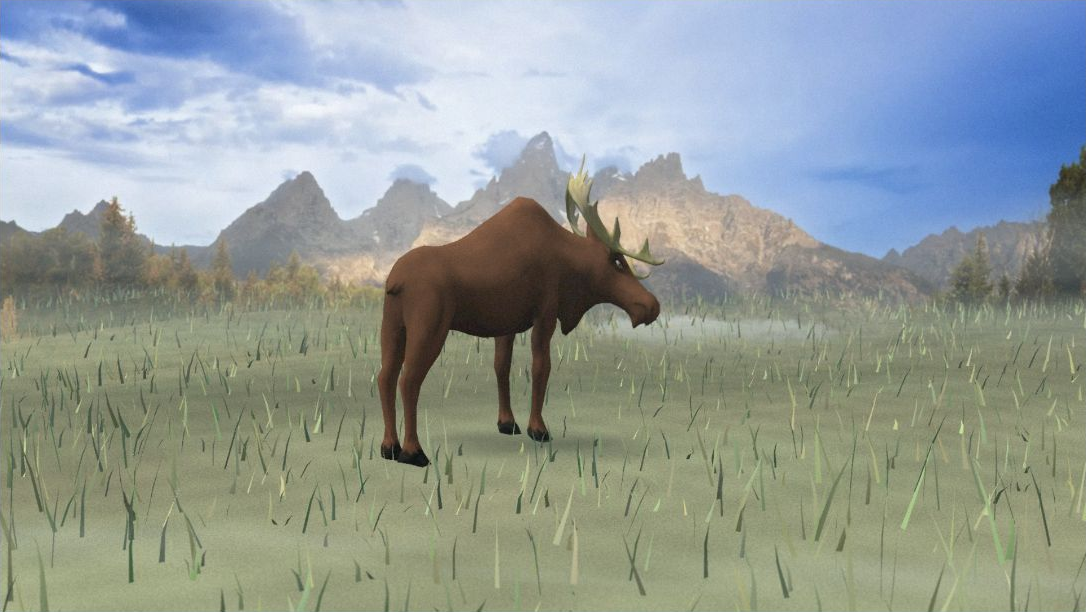
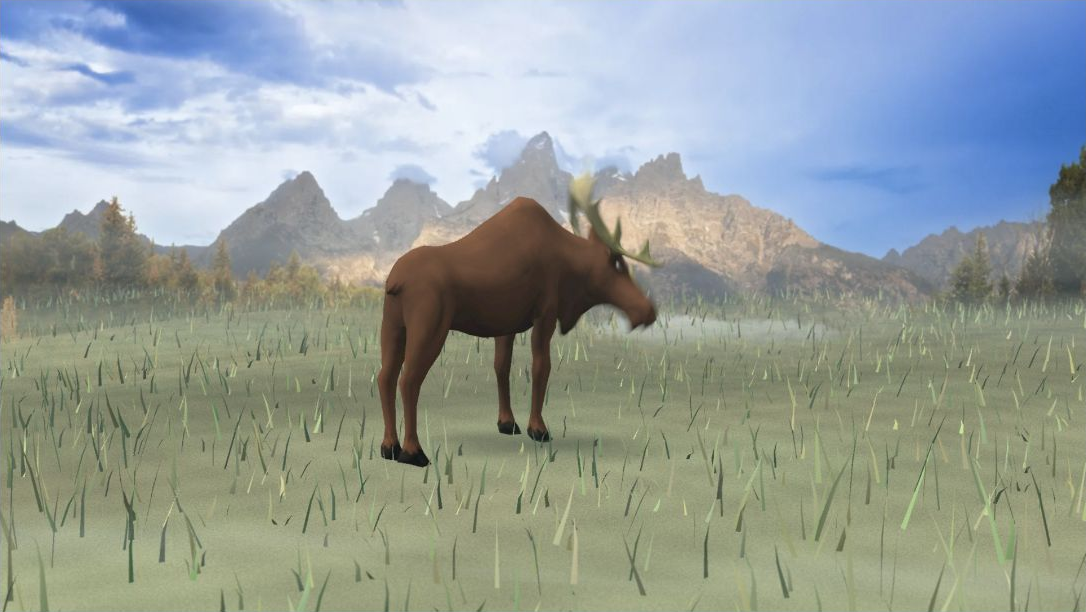
Both photos use f/11. Auto ISO changes from 100 to 1600 to keep their brightness similar, so the movement blur is easier to compare.
For aperture, I paused the daytime moose scene and kept shutter speed at 1/1000 second. Auto ISO changes with the opening to keep brightness similar. The background difference comes from the game’s camera simulation; I did not add blur to these case-study images.
I kept the detail in view between photos.
I added a full-window photo viewer with Fit, Fill, and Actual size, plus pan and zoom. When someone moves to the previous or next photo, the viewer keeps their zoom and the same relative area in view. They can keep looking at the detail they chose instead of starting over each time. The view stays within the image edges; it does not track the animal.
I made the guided comparison repeatable and kept free practice open for the moments people choose themselves.
Chapter 4 of 6
How I built itI connected the settings to what happens in the photo.
I used AI to help write and revise the code. I decided how the camera should behave, what each lesson needed to explain and whether the photo matched that explanation.
I checked whether shutter speed changed movement blur and aperture changed background detail. The meter, saved photo and feedback had to match the selected settings. I took photos, inspected the results and revised the parts that didn’t agree. Adding the priority modes meant keeping the setting someone chose separate from the one the camera calculated. Both had to carry into the saved photo and its explanation.
Explore the build
See how a camera choice becomes a photo.
Choose a stage to see what I changed and how it worked.
Test the same head movement at two shutter speeds.
-
01
Controls
Someone chooses the camera settings.
-
02
Camera calculations
Light, focus and movement shape the photo.
-
03
Saved photo
The generated JPEG is stored with its camera settings.
-
04
Feedback / progress
Explain the result and save the place in the lesson.
The shutter lesson repeats the movement. The timing lesson lets someone choose a real pause.
Compare the setting at the same moment.
November 5–6 · Lesson design
- Problem
- A slow shutter could look sharp when the animal paused. Two different moments could hide the effect of the setting.
- What I changed
- Repeat the same head lift at 1/60 and 1/1000 in the shutter lesson. Keep live timing in Catch the pause.
- Working result
- The guided photos test the same movement. The timing lesson compares movement with a real pause at matching settings.
My roleI set the photography direction, designed the lessons and reviewed the working versions. AI helped write and revise the code.
Development checks show the game working. Customer learning outcomes have not been measured. Saved progress is local to the browser.
What sits behind the interface
HTML, CSS and JavaScript
The lesson steps, camera controls, comparisons and responsive layouts.
Three.js
The 3D animals, scene and camera simulation, connected to the settings and generated photo.
Saved progress
Lesson checkpoints and completion live in browser storage. This is not account-based or cross-device recovery.
Separate parts
I kept the scene, camera, photo, lesson and progress code in separate modules so each change could be checked.
I took photos and checked what the game did.
The development checks covered exposure, lesson steps, saved photos, keyboard controls, recovery and different screen sizes. I also reviewed the focus targets, photo comparisons and the animal’s position in the scene.
Chapter 5 of 6
Make room for the photoI kept the picture and the next step together.
On desktop, the scene and settings sit beside each other. On a phone, I kept the camera readings with the picture and the lesson control beside its instruction.
I shortened the first lesson’s instructions, made its photo comparisons easier to inspect and kept restart and help available. Full-screen view keeps the camera controls with the scene.
I kept “Current” beside the selected setting and “Choose this” beside the next lesson choice. The labels update as someone taps a button or moves a slider. They can leave and return to the saved lesson in the same browser, rather than starting over each time.
Can someone see the animal, read the current setting and reach the next action?
Chapter 6 of 6
What works todayI built the game and added it to the member account.
I designed the lessons and controls around my photography experience, with AI helping me build and revise the code. The game sits alongside the planner in Where the Wild Beasts Roam.
- Built
-
Camera behavior, lessons and feedback.
I connected shutter speed, aperture, ISO, focus and light to the photo someone takes. The game has two wildlife scenes, eleven guided lessons and free practice.
- Released
-
Available to existing paid members.
I added the game to their account page alongside the planning tools. Access uses the website’s existing paid membership checks.
- Still learning
-
How people use the lessons to make their own choices.
I still need feedback from people using the game to understand how well the lessons help them make their own camera decisions.
Changes I made along the way.
- Put the control beside the lesson.
I moved the relevant camera control next to the instruction so someone could make the choice right there.
- Compare the same moment.
The guided shutter test replays the same head movement for both photos. A quiet moment no longer hides the difference between shutter speeds.
- Keep the photo and the next step usable on a phone.
I shortened instructions, made the comparison photos easier to inspect and kept lesson progress in the same browser.
- Show what is loading and how to recover.
The game shows loading progress, offers a retry and explains when someone needs to sign in again.
- Show who controls each setting.
I added Manual, shutter-priority and aperture-priority practice. People can see what they choose and what the camera chooses.
- Separate the current setting from the next choice.
“Current” marks the selected value. “Choose this” marks what the lesson asks someone to try next.
- Keep the viewed area between photos.
The full-window viewer keeps the zoom and relative viewing position when someone chooses Previous or Next.
- Keep sound optional and quiet.
Short bird and breeze sounds leave quiet gaps. The game remembers mute and stops the sound when it goes into the background.
Release review: November 11, 2026, against verified live version 0.2.13 and the two new lessons in 0.2.12. The evidence includes owner-session checks, real game captures, and emulated phone checks. The latest label update did not repeat all eleven lessons. Customer learning outcomes, a fresh paid-customer login, and physical-phone testing are not established by these records.
Practice the camera.
Plan the drive.
The planner turns field knowledge into a route. The game gives people a place to practice camera settings.
Explore the planner case study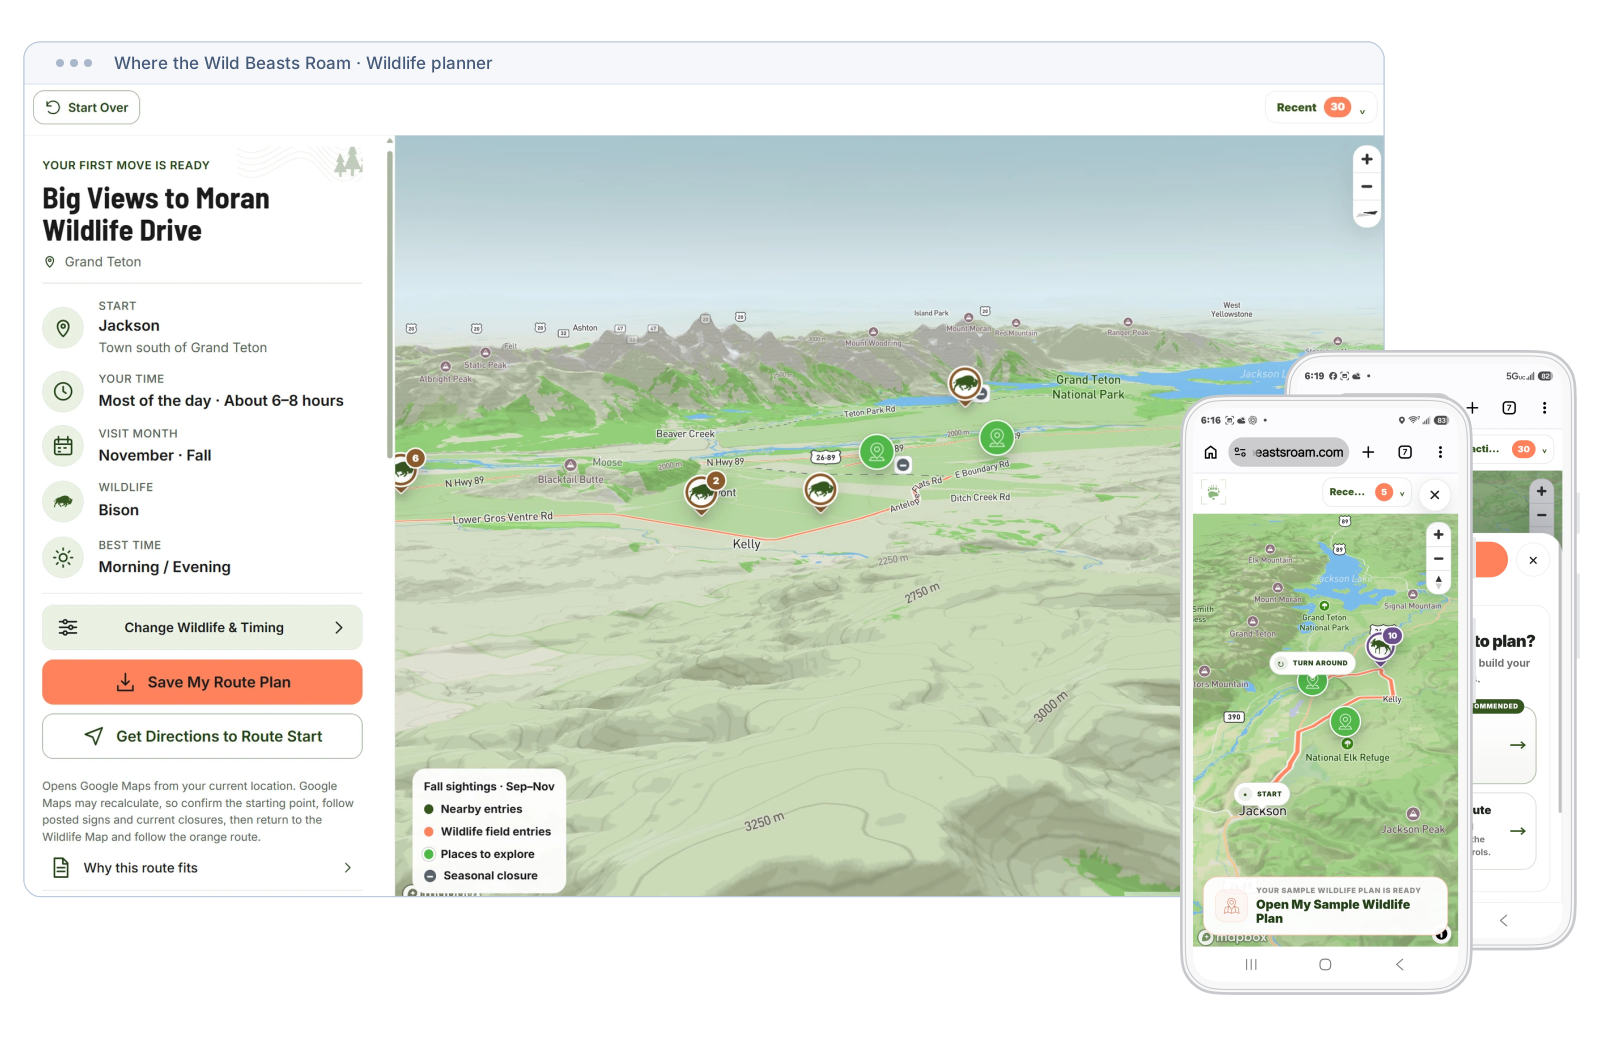
Game imagery and credits
The screenshots show a simulation. The interface and game behavior are my work with AI-assisted development; the animal models include work by other creators.
Grizzly: “Grizzly Bear” by freddy1231, CC BY 4.0. Scale, orientation, materials and head animation adjusted for the game. Supplied through Ai2’s Objaverse.
Moose: “Low Poly: Moose - Anim Test” by Ulrik Langvandsbråten, CC BY 4.0. Colors and motion adjusted.
Old Faithful background: NPS / Jacob W. Frank, public domain. Grand Teton background: Where the Wild Beasts Roam.